LHRB install difficulty?

rtf

Member
Likes
17
Location
Pittsburgh, PA
I think I’m ready to switch over to a hand brake kit. My KTM is on its way out and my other bike is an E ride pro with a hand brake that I ride more frequently. I’ve noticed when I switch over to the Varg my braking is noticeably off a bit.

My wrenching skills are decent but admittedly I follow instructions/tutorials when doing jobs. How difficult is getting the brakes bled afterwards and any special tools required?
 

Theo

Well-known member
Likes
261
Location
Italy
Bleeding the brake is neither difficult, nor it requires special tools, but you need to be patient.
I use this pretty common method; they use that hose with a one way valve but you can just use any transparent hose that fits, like a fuel hose, just test that it doesn't get dissolved with brake fluid:
What they say @ 4:14 is very important and I'd like to explain the procedure better:
1- fill the reservoir
2- squeeze the lever and hold it squeezed
3- open the bleeder valve just a bit until the lever starts moving more
4- close the bleeder valve before the lever touches the handlebar
5- release the lever
6- check that the reservoir is not empty and refill it before it becomes empty
and repeat until the lever feels normal and you don't see any more bubbles in the hose.
At the beginning the lever will feel pretty soft and it will take some time until it starts to show some resistance, be patient.
If you can't reach the lever with one hand and the bleeder valve with the other, you need someone to help you; in that case, it would be best if you use the lever and the other person operates the valve following your instructions: «open», «close», «open», «close»... .
Then I suggest that you test the brake in some safe area to see whether the stopping power is adequate. The LHRB needs some effort to lock the wheel but you should be able to do so.
 

rtf

Member
Likes
17
Location
Pittsburgh, PA
Bleeding the brake is neither difficult, nor it requires special tools, but you need to be patient.
I use this pretty common method; they use that hose with a one way valve but you can just use any transparent hose that fits, like a fuel hose, just test that it doesn't get dissolved with brake fluid:
What they say @ 4:14 is very important and I'd like to explain the procedure better:
1- fill the reservoir
2- squeeze the lever and hold it squeezed
3- open the bleeder valve just a bit until the lever starts moving more
4- close the bleeder valve before the lever touches the handlebar
5- release the lever
6- check that the reservoir is not empty and refill it before it becomes empty
and repeat until the lever feels normal and you don't see any more bubbles in the hose.
At the beginning the lever will feel pretty soft and it will take some time until it starts to show some resistance, be patient.
If you can't reach the lever with one hand and the bleeder valve with the other, you need someone to help you; in that case, it would be best if you use the lever and the other person operates the valve following your instructions: «open», «close», «open», «close»... .
Then I suggest that you test the brake in some safe area to see whether the stopping power is adequate. The LHRB needs some effort to lock the wheel but you should be able to do so.

Thank you for the detailed response. That helps a lot. My next question is this. Is the kit that Starks sells the same between the MX and EX?

Lithium powersports is saying the kit fits both but it’s a different part number and price on Starks website?
 

FreddyFugazi

Member
Likes
21
Location
BVT
Maybe I'm just an impatient SOB, but it never made sense to me to force air bubbles to go against gravity. I use a syringe to push the fluid from the bottom up and find it much easier and faster. You can get the syringe you need at tractor supply or similar.


Theo

Well-known member
Likes
261
Location
Italy
That's another common method.

It has just occurred to me that I haven't pointed out how important it is to make sure that no brake fluid end up on the brake pads because, according to some people, if that happens it can leave a residue that makes them slippery and that is hard to remove. This piece of advice should be followed regardless of the technique used. Being careful and putting some rag or paper towel onto the caliper just in case should be enough.
 

AbnormalWrench

Active member
Likes
43
Location
Seattle, WA, USA
I had no luck bleeding the rear brake the old fashion way. Had to push fluid through the caliper to get a decent lever. A lot of master cylinders on newer bikes are finicky and just won't work without it.
 

Theo

Well-known member
Likes
261
Location
Italy
Well, I've successfully used the old fashion way but only with other bikes: I've never bled the LHRB of the Varg; I just assumed it would have worked, without having ever done it. Now that I think about it, it also has a pretty long brake line.
 

AbnormalWrench

Active member
Likes
43
Location
Seattle, WA, USA
It is the type of master cylinder that determines whether you can do it the old fashion way or not. Length of hose and size of calipers don't matter. I had the same problem with my KTM clutch - you could bleed that thing all day long, it would never get a lever.
 

rtf

Member
Likes
17
Location
Pittsburgh, PA
All good stuff. Will definitely make it easier for me. Is anyone else aware of any differences between the mx and ex LHRB kits? The price difference from Stark is about 45$.
 

svtride

Active member
Likes
33
Location
DEETROIT
Maybe I'm just an impatient SOB, but it never made sense to me to force air bubbles to go against gravity. I use a syringe to push the fluid from the bottom up and find it much easier and faster. You can get the syringe you need at tractor supply or similar.

BINGO!..I reverse flush the system of air…works great.

GRAB185.jpg
 

Theo

Well-known member
Likes
261
Location
Italy
It is the type of master cylinder that determines whether you can do it the old fashion way or not. Length of hose and size of calipers don't matter. I had the same problem with my KTM clutch - you could bleed that thing all day long, it would never get a lever.
Do you have the Formula or the Brembo master cylinder?
 

rtf

Member
Likes
17
Location
Pittsburgh, PA
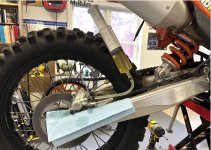
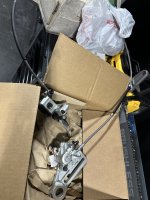
So just a quick update here. I got the new LHRB setup from Stark and it came completely assembled and bled. I took off everything from the bike to see if it’d be possible to route everything correctly without taking it apart but doesn’t appear you can. Before I break it down, am I missing anything or does it in fact have to be taken apart to install correctly?

IMG_1809.jpeg
 

Theo

Well-known member
Likes
261
Location
Italy
Before I break it down, am I missing anything or does it in fact have to be taken apart to install correctly?

Here is the routing of a Varg which came with a LHRB; the routing is highlighted in yellow:

routing.jpg

I suppose that you could try:
1- checking whether the master cylinder can pass between the frame, the VCU and the battery
if it does,
2- removing the rear shock and hopefully making the master cylinder passing between the motor and the frame and then again between frame, VCU and battery.
 

rtf

Member
Likes
17
Location
Pittsburgh, PA
It would be so much easier to just disconnect the brake line, feed it through its proper path, reconnect it, and then bleed it after you've installed the components.

Absolutely. When I looked at it after I took it apart it was clear that’s what needed to be done. I fed the line through the correct path (thanks Theo) and got it all connected and in place. Reverse bled the brakes as described in this thread and actually have a really good lever pull.

Life was calling and I ran out of time to finish it up but already have my next question. When I took off the rear brake, I disconnected the light switch and just plugged it above the battery. What am I missing as far hooking up the switch for the hand brake now? The kit didn’t come with any new wiring for the new hand brake lever/switch?

Thanks again for all the help in this thread, much appreciated.
 
Last edited:

FreddyFugazi

Member
Likes
21
Location
BVT
You should have received a read brake switch for the lever that functions the same way as the front brake: it clips into the brake lever housing and uses one of the currently unused ports under the phone the same port/plug the foot brake used. Part number is SEX1-BR-RWH-80

Be careful routing the wire. The only reason I know the part number is because I pinched mine during installation trying to route it through the fancy handlebar holes and had to order another ($29 USD).
 

rtf

Member
Likes
17
Location
Pittsburgh, PA
You should have received a read brake switch for the lever that functions the same way as the front brake: it clips into the brake lever housing and uses one of the currently unused ports under the phone the same port/plug the foot brake used. Part number is SEX1-BR-RWH-80

Be careful routing the wire. The only reason I know the part number is because I pinched mine during installation trying to route it through the fancy handlebar holes and had to order another ($29 USD).

That’s making more sense. The only thing that came was the brake assembly with the new Brembo master cylinder. Guess I’ll reach out to Stark and see about getting the wiring.

Any tips to getting the wire ran through the bars?
 

Theo

Well-known member
Likes
261
Location
Italy
It's weird, though, that Stark sends the components already assembled if they have to be taken apart again to then change the fluid and replace the copper/aluminum washers. I understand that Stark makes such sub-assemblies for the production line in the factory, where they can be installed pretty easily before installing the powertrain. I don't understand why Stark would ever sell pre-assembled kits instead of full kits to be assembled for later upgrades, if they can't be used that way. Maybe it is possible to just slide the master cylinder behind the frame if one removes the lever. I'd be curious to know what service support would say about this.
 
Top Bottom