Code 37 after +6000kms of MX


wwmotors

Well-known member
Likes
458
Location
Bavaria Germany
Yesterday i got my first code or problem on my 2018 MXR (code 37) after +6000 MX kms. Strange: The bike was standing dry for weeks, never got washed the last weeks, because in the MX hall it is not really dirt sticking to the bike. Then after 2 weeks of storing in the house at 10-15 degrees Celsius, I did 6 stints with 10 minutes in the MX hall. Drove the bike home in the closed van. When riding the bike slowly into my house, the code came up!
My explanation: The humidity was already there. When the bike cooled down in the back of the van to nearly 0 degrees Celsius, the relative humidity went up over the critical barrier. Is there any tutorial from other guys here, how to change the desiccant pack (descrition, pistures , Youtube video etc...) ?
First i will check data with MT and keep You posted, what the datas say.
Cheers
 

Rashid510

Well-known member
Forum's Sponsor
Likes
1,171
Location
South San Francisco, CA
@wwmotors - you can change out the desiccant pack that will partially help. But based on the reading the humidity value is within spec...The humidity sensor can be thrown off pretty easily. You may want to clear the code with MT and see if it continues.
 

wwmotors

Well-known member
Likes
458
Location
Bavaria Germany
@wwmotors - you can change out the desiccant pack that will partially help. But based on the reading the humidity value is within spec...The humidity sensor can be thrown off pretty easily. You may want to clear the code with MT and see if it continues.
Ok, i already deleted the code. I will report, when it shows up again! I try to change the desiccant pack. Thanks and Cheers
 

wwmotors

Well-known member
Likes
458
Location
Bavaria Germany
I have the same code 37 on my bike. Could you please tell me how you reset it. I'm kind of new to this.
I resetted this with ALTA Multitool. Thats the only way, to do this! You will find a lot of threads how to setup MT on Your laptop and use it!
 

wwmotors

Well-known member
Likes
458
Location
Bavaria Germany
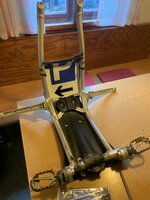
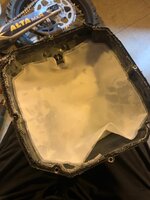
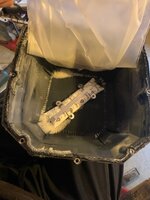
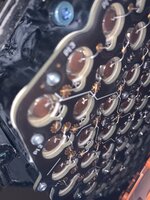
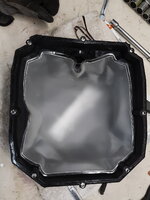
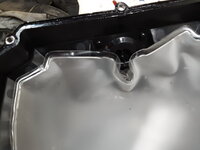
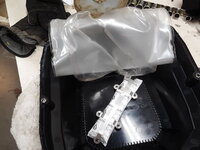
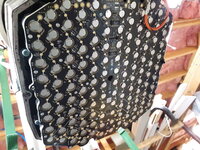
So to clear, what happened to my battery with the code 37, i removed the battery frame in 5 minutes. For that i layed the bike down to the side. Then i warmed up the battery around the seal of the bottom cover. 30-40 degree celsius where enough to soften the sealing. I removed the cover easlily with a screwdriver and then it fell off after warming up all the way around. Inside the bottom cover is a airbag which cares for pressure equalization, without getting humidity in! A very good idea, to do this that way! The airbag is connected to the outside air. So be careful not to hurt it. Under the airbag You will find the decassent bag. In my case it was already broken from shaking around during 6500 MX kms of hard MX! So i cleaned up everything, also removed the rest of the seal as clean as possible and fitted everthing together. Cleared the code with MT. Bike is running like new!
P.S: I was curious about my cells, so i opened the orange cover and checked the cells and wirebonds (Careful HIGH VOLTAGE!) But also there everything looked perfectly dry! So here we go for the next 6500kms!

IMG_7220.jpg

IMG_7221.jpg

IMG_7222.jpg

IMG_7224.jpg
 

wwmotors

Well-known member
Likes
458
Location
Bavaria Germany
A blown dessicant pack...yay. Were you able to clean out the dessicant from the butyl? And did you apply fresh butyl?
Yes i cleaned it with a small screwdriver and a knife. i bought butylstring 4mm. Worked out pretty good. STRANGE: I have a EXR with 2000 km odo. Yesterday i got also code 37!!! Exact same situation: i went 5 stints with 12 minutes in the cartinghall at 10 degree C. Then i went home. Next day unloading the bike at 0 degrees! Code37!!!
UPDATE: Today i checked with Multitool both bikes: They had exactly the same humidity of 49%! I have no idea, why i got the same humidity warning on 2 bikes!?!
 

TCMB371

The Silent Assassin
Forum's Sponsor
Likes
2,476
Location
Charlotte, NC
Code 37 is triggered when the humidity sensor reads >70% for over 60 continuous seconds. Check your log (will need to download it from the bike) and see if that had occurred.
 

CookieMonster

Active member
Likes
30
Location
New Hamphire
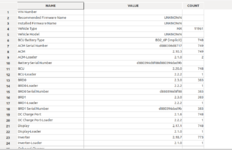
Hello all. I am having trouble resolving a code 37 error (Relative Humidity Fault). When the bike is connect to MT in live mode I observe relative humidity (RH) of about 30% during the initial debug. I have tried removing the bottom cover and "orange PCB cover" of the battery pack and observed no corrosion. I used a hair drier to reduce the measured MT humidity to 20% and the fault persist. The bladder and silicia pack silica pack located at the bottom of the battery pack cover look good(see attached). But after reading this post I tried replacing the silica pack and reassembled the battery pack with fresh buty. One week later the measured MT RH remained at about 30%(no change). I have repeatedly tried clearing the fault from the MT fault tab and continually received a message to resolved the issue before trying to clear the flag. Is this a latched or hysteresis comparator fault? Does anyone know where the RH sensor is located? I am starting to think I might need to disassemble the bottom half of the pack to resolve this problem. Any advise would be appreciated.

20230324_130753.jpg

20230324_130807.jpg

20230324_130918.jpg

20230324_131008.jpg
 

Matt

E-Rider
Likes
605
Location
Rochester, New York
Do you know what the humidity is in the room you are in? You can try putting the battery in a room that is air-conditioned for a few hours with very dry air then put the bottom back on and check what the bike is saying. You can clear the code with multi tool and see if it comes back after that as well.
 

CookieMonster

Active member
Likes
30
Location
New Hamphire
In short RASHD510 I have installed the latest version of software in 2019. Thank you for the heads up on Pos radsock... should have caught that myself.
Some history on the motorcycle. I purchased the motorcycle in fall 2018. When MT became available I download and installed the software per TCMB371 initial post. At that time I update all firmware per this forum. Since that time the windows notebook containing this version of MT went kaputt. I have since been using TCMB371 new version of MT posted on this forum. I have never seen this error in the entire time I have owned this bike some 5 years, 2050mi and 171hrs.

I have been monitoring the RH in the room the bike has been sitting in and it has been about 30%. Does anyone know what the lower limit of this fault?

alta_data.PNG
 

Mark911

Well-known member
Likes
1,123
Location
Corona Ca
The RH sensor is on the top cover PCB. It's a standard part made by Honeywell as I recall. I've got pictures of the A pack part, reference designator and location. I think the R model is located in approx the same place but might have a different reference designator. I have a spec sheet on that part somewhere, but would need to do a bit of searching. It's an easy fix and the parts probably only $10 at Digikey or Mouser Electronics.
 
  • Like
Reactions: #76

CookieMonster

Active member
Likes
30
Location
New Hamphire
Thank You Mark911. I have the A battery pack. Pictures would be great. Sounds like I need to pull the battery pack, remove the top cover and see what is going on. A google search of RH sensors from Honeywell came up with HIH-4602 for a part number. The parts in a TO-5 can package does that sound right? Do you know if the part also measures temperature? Don't kill your self at this time to find the datasheet, I suspect I will be able to figure it out once I have the pack disassembled.
 

Mark911

Well-known member
Likes
1,123
Location
Corona Ca
Thank You Mark911. I have the A battery pack. Pictures would be great. Sounds like I need to pull the battery pack, remove the top cover and see what is going on. A google search of RH sensors from Honeywell came up with HIH-4602 for a part number. The parts in a TO-5 can package does that sound right? Do you know if the part also measures temperature? Don't kill your self at this time to find the datasheet, I suspect I will be able to figure it out once I have the pack disassembled.
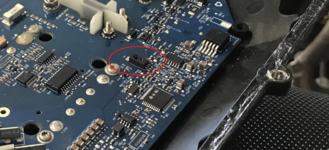
Here's a pic of the top cover removed (also the orange safety cover) showing the location of the RH sensor and ref designator (U4). DO NOT coat the sensor after installation. It needs to be open to the air inside the pack.
RH sensor.png
 

Oded

Well-known member
Likes
874
Location
Israel
Curious to know, is it possible to remove and replace electronic chips from the BCU without detaching the BCU from the top cover?
 

Mark911

Well-known member
Likes
1,123
Location
Corona Ca
Certainly! I believe any surface mounted component can be replaced. There are more components on the other side (particularly the DCDC converter). In fact, it's the DCDC converter that prevents the A packs from easily pulling the board from the cover as it's bonded to the heatsink which in turn is bonded to the cover. The R packs noted this PITA process and mechanically attached the heatsink to the cover with screws accessible from the outside making board removal much easier. When removing a component, the trick is to carefully remove the conformal coating using solvent on and around the chip you want to replace before you attempt to desolder. This process can be quite messy as the thinned coating can spread and it gets gooey with can attract debris and solder balls. On components with multiple leads its sometimes easier to apply a low temp solder over the existing solder. This keeps the solder on the leads fluid longer allowing the chip to be removed without lifting pads. You'll need to wick off all the solder after removal so that no low temp solder remains, and you have nice clean pads for the new component. After the part is replaced, it's best to use a spray type coating specifically for the purpose of sealing electrical components. Before you seal it, check for solder balls and any other debris that could cause a short anywhere on the board. LOOK VERY CLOSELY under magnification as I've been bitten by this issue using just a visual check. Remember to check the location of pin #1 on symmetrical components before removal so you don't solder the new component 180 degrees out. A good soldering iron with adjustable heat and interchangeable tips is also a must.
 

Similar threads

Top Bottom