My Moto Van build thread


Philip

Administrator
Staff member
Likes
4,214
Location
Lake Havasu City, AZ
I thought I should create a thread to document my van build. Maybe it would help others. Or maybe others will help me. It will definitely create more accountability for me to continue working on it and eventually finish it.

I will be posting progress pictures and maybe will make a video some day, when it is ready. It should be a cool project.

Stay tuned! :ricky:
 

Philip

Administrator
Staff member
Likes
4,214
Location
Lake Havasu City, AZ
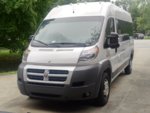
The van is a 2014 Ram ProMaster 2500 Window Van with a 159" wheelbase.

I like windows all around. They make it easier to back up, park, and change lanes in traffic as if I am in a car.
IMG_20180909_1351559.jpg
I installed a 5% limo tint on all the rear windows. Works great.
IMG_20180909_1340176.jpg
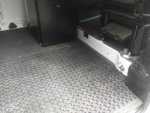
Floor: Three 6x4' 3/4" thick rubber mats from Tractor Supply, and two 3x5' rubber rugs from Home Depot to keep the walking surface clean from sand and dirt.
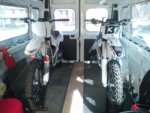
Front wheel chocks.jpg
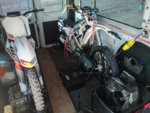
Three front Motosport clamping wheel chocks for the bikes.

I used rivet nuts in the floor, so the wheel chocks can be removed quickly without having to crawl under the van.
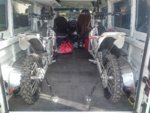
Rear racheting straps.jpg
Two Retractable Ratcheting Tie-Down staps to keep the bikes' rear wheels secure, and to dampen any side-to-side motion of the bikes.

You can also see Lexan on two middle windows. These two side windows that are most likely to get smashed by the handlebars, so I covered them with two full-window 1/4" thick Lexan sheets.

IMG_20180909_1344162.jpg
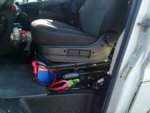
A rotating passenger seat. This is the dedicated fornication spot, until I add a real bed.
IMG_20180909_1338235.jpg
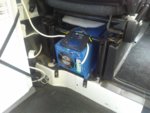
This is a Aims Power 4000 Watt Pure Sine Inverter and Charger 12VDC to120/240VAC. Right now it is only connected to the stock battery and alternator. Good enough to run the fridge, A/C, or charge the Alta from 120V. Need to add a few Lithium batteries to be able to charge from 240V.
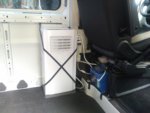
IMG_20180909_1337011.jpg
This is a nice North Storm Portable Air Conditioner 8,000 BTU - AC, Heater, Fan, Dehumidifier All In One unit that I installed. It can be removed in a couple of minutes, if needed. I didn't want the van to look like an RV with a roof-mouted A/C.
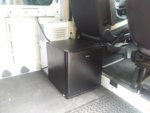
IMG_20180909_1339516.jpg
A cheap $49 college dorm fridge works great for now. No need for those fancy $900 Dometic fridges yet.
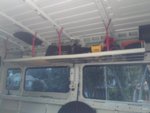
IMG_20180909_1341106.jpg
This wire shelf from Home Depot is to store junk and some riding gear. I suspended it on nylon straps and added a foam protector so that I could bump it with my head safely, which I sometimes do.

These are all the upgrades for now.
 

Philip

Administrator
Staff member
Likes
4,214
Location
Lake Havasu City, AZ
IMG_20180902_2044032.jpg

This is my today's project. Got myself some welder's tan. Welded a battery tray for my four Battleborn 100Ah LiFePO4 batteries, plus a spare room for a fifth battery, if I ever decide to buy one more.

Also, welded a tray for the 20ga fresh water tank. This is to pressure wash the bikes and to take shower.

Both of these items are going under the van not to clutter the van's interior.
 

Philip

Administrator
Staff member
Likes
4,214
Location
Lake Havasu City, AZ

magatta

Well-known member
Forum's Sponsor
Likes
66
Location
Washington
Should I type the descriptions above the pictures or below?
I want to be consistent and make it easier to view and read.

I have added the missing pictures to Post #2.
Below as they are now :) (such a cool thread to follow!)
 

Philip

Administrator
Staff member
Likes
4,214
Location
Lake Havasu City, AZ
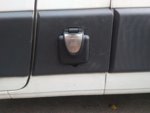
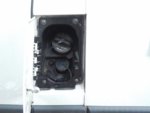
This weekend I added a NEMA SS2-50P 120/240V RV connector and a water fill neck and cap. Lots of custom fabrication went into this. It came out pretty clean, minus a couple of small scratches that will go away over time. I am pretty happy.

IMG_20180916_1935265.jpg

IMG_20180916_1935067.jpg

IMG_20180916_1936357.jpg

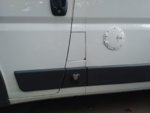
The water fill neck uses the location that is normally used to fill the DEF fluid on diesel vans. The location was unused, so I jumped onto the opportunity.

It dawned on me only after I was all done that I now have my water fill right under the gas fill, and the 240V connector right under the water fill. :eek:

Luckily there are no building codes that apply to such builds, and I probably will not be mixing the fill necks, or irrigate the 240V connector, too often.
:ROFLMAO::ROFLMAO:
 

Philip

Administrator
Staff member
Likes
4,214
Location
Lake Havasu City, AZ
Philip what kind of wheel chocks are those? And how well do they work at keeping the bike secure if you don't use the tiedowns in the rear?
Found it, finally. Bought them at MotoSport.com

Motosport Clamping Wheel Chock | MotoSport

I first bought two from MotoSport, but then bought the third one somewhere else. The third wheelchock was crap. Thinner metal, rivets instead of bolts, and crooked welds. Do not buy them anywhere else, MotoSport has the good stuff.

They do not hold the rear wheel, they only hold the front. The rear is still free to jump up and down. Also, there is nothing that keeps the bike from swinging left to right undamped. But, right after I added those ratcheting straps to hold the rear, both issues were magically solved. I am quite happy with how this all came out.
 

Speedkills

Well-known member
Likes
163
Location
Nederland, CO
I had these in my last trailer and found I preferred to use them to clamp the rear wheel instead of the front sometimes as it held them more securely, but front wheel clamping was easier to load up.
 

Philip

Administrator
Staff member
Likes
4,214
Location
Lake Havasu City, AZ
Things have been moving slow, but I finally have reached the expected result!

The bikes are inside the van and are fast charging at 240V from the inverter and four LiFePO4 batteries without the engine running. I also have a small 120V fridge running at the same time.

This setup should give me about 4kWh of charge, if I keep the engine shut down.

The stock alternator can help, if I start the engine. I hope to be able to charge both bikes, when driving.

If the batteries run low, I can always switch to power the inverter only from the alternator, but then it will be charging at 120V only.

IMG_20181215_1330291.jpg

IMG_20181215_1331053.jpg
 

Whymee

Old and slow, but hopefull!
Likes
112
Location
West Virginia
Found it, finally. Bought them at MotoSport.com

Motosport Clamping Wheel Chock | MotoSport

I first bought two from MotoSport, but then bought the third one somewhere else. The third wheelchock was crap. Thinner metal, rivets instead of bolts, and crooked welds. Do not buy them anywhere else, MotoSport has the good stuff.

They do not hold the rear wheel, they only hold the front. The rear is still free to jump up and down. Also, there is nothing that keeps the bike from swinging left to right undamped. But, right after I added those ratcheting straps to hold the rear, both issues were magically solved. I am quite happy with how this all came out.


The original is called an ATK Bike Shoe. They are since long out of production. Nice to see other companys are continuing to manufacture it.

I have 4 of these, two of which I have been using for 20 years, give or take. Never an issue. I highly recommend this Bike Shoe, if it is made as well as the original.

Nice van setup Phillip. Been there done that. My van days are long gone. Now a enclosed trailer or toyhauler depending on the duration of stay.

I question 20 gallons of water. I could not get one wash out of that. Then again maybe the east coast has "stickier mud". LOL

Regardless, nice setup!
 
Top Bottom