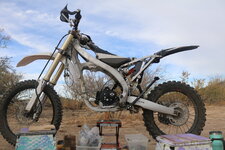
2011 YZ450 to V3 build while camping


SubSonic

Well-known member
Likes
45
Location
AZ
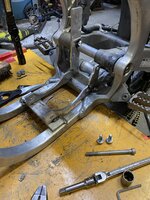
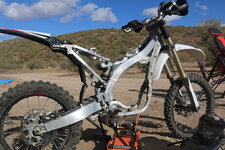
started taking apart 2011 YZ450 yesterday -
got close to getting engine out -
still have to pull swing arm bolt - think going to pull this bolt Before removing other engine mounts
might be easier - bottom motor mount was crazy tight - needed cheater bars

fuel hose connectors to fuel pump and injector are plastic and look Easy to break so I
removed Fuel Hose clamps on hoses - was easy
cut finger trying to take apart a wire connector -

this bike is the 5th yamaha 450 I have owned -
others were 2007 and were used for supermoto and street -

Have to say I kind of feel bad taking nice bike apart -
rode bike some and its Way to fast for me in the desert -
in the 2 months have had bike i rode bike at 4000ft differences in altitude
and fuel injection engine ran very good - was Impressive -

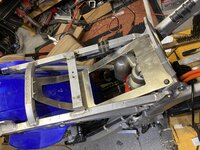
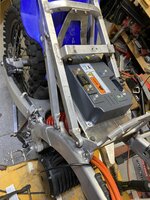
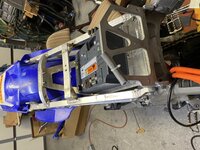
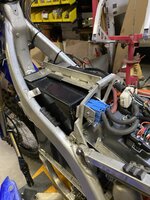
I was not sure that battery would fit thru top of frame till I took tank off yesterday -
looks like it will fit -

Im doing this build while traveling in my RV so dont have shop to do this in -
so if i need to weld something or machine parts think im going to a Maker Space in Tucson AZ -
Maker Space web site looks like they have tool i would need -
If anyone has used this Maker Space let me know -
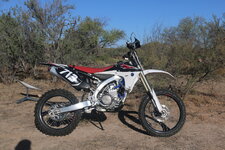
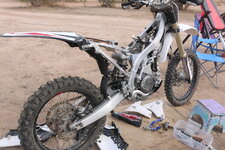
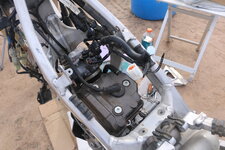

IMG_9877.JPG


IMG_0001.JPG


IMG_9998.JPG
 

SubSonic

Well-known member
Likes
45
Location
AZ
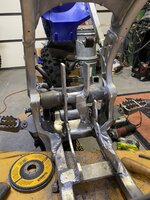
finished removing engine -
wiring connectors were pretty hard to get unplugged so using a tiny pair
of wire cutters cut out the plastic lock clips on each connector for Much easier removal
later today going to test fit motor in frame and get some idea on motor mount brackets
that need to be made -

IMG_0002.JPG
 

SubSonic

Well-known member
Likes
45
Location
AZ
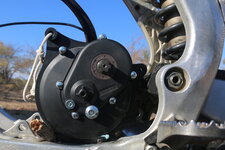
test fit motor today -

did not smash finger

after a full day of Looking -

I think going to use a mount similar to how old racing go karts did it -
its adjustable - light weight - easy to make -

to this design added metal rods with tie rod end bearings to --> motor

looked at design again - made it as simple as I can -
think mount can be made with parts from good Hardware store -

if this works - it should work on most twin bottom cradle bikes and motors -

got this idea after it was dark and need to look at frame and motor in the morning -
so things could change -

taking engine out was fairly easy -
did not like electrical connectors - 3 hands needed -
I usually clip out lock plastic and zip tie back together - works well -

fuel pump connectors is super breakable plastic -
injector has Tamper proof screws on a race bike

took engine out right side of frame -
its heavy - no lifting with one hand like electric motor that is replacing it

engine has hydraulic clutch works well - one finger -
going to try using this lever /master for rear brake -
not sure if it will work -

area I am camped at is close to a twisty road so a lot of motorcycles -
4 miles away is a pretty good hardware store -
5 miles away is the Best sweet potato fries -


IMG_0057.JPG
 

SubSonic

Well-known member
Likes
45
Location
AZ
after looking at frame/ motor in daylight -

Looks like this motor mount is gong to work - Great -

should be able to attach to ALL of the motor mounts at once if needed -

going to try the hardware store build first -

was so excited last night thinking about this I got little sleep-
kind of dinged out today -

so I might just work on controller mount today -
see what its going to take -
pick up parts tomorrow

I have been thinking about motor mount for a month-
went thru a dozen different ways to build -

its good that I did not have access to welder or I would have made a weld in mount --
not having tools- have to design simple -

will post picture once I get motor ruffed in place -

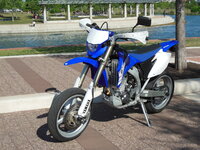
this is a plated WR450 Supermoto I built about 2010 -
tuned suspension and lowered 2 inches -
17" cush drive mag wheels - tubeless - Fun Bike


WR POND 2 copy.JPG
 

SubSonic

Well-known member
Likes
45
Location
AZ
went to hardware store today -
its not only is it a Good Hardware Store its a Great Hardware store -
had Everything i needed and Way More -

after looking a little more I think can Add in Rubber vibration dampener into design if needed -
there is a couple of ways to add dampener and think it can be added later -
could be nice ?


purchased parts - did a quick ruff in of motor
this is going to work Great -

attached to 4 motor mount points so far ( 2 pairs of 2 mount points- the threaded ones )
I think this will be strong enough -
will attach to the two other mount points also -

have to cut some steel and Im not looking forward to it -

I going to put center of chain line a few mm Higher than stock -

some supermoto conversions using Yamaha YZ and WR had problems with Chain Block wear-
my guess is they were running small front sprocket - causing this -
None of my bikes had this problem but I gear tall - stock or larger front sprocket -
WR supermoto in photo above has 15 /38 gearing from memory

pretty sure there will be enough adjustment in mount to do what ever is needed -
move around - then lock in place -

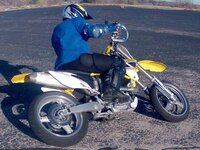
this photo is my YZ450 supermoto track bike -
was 06 with stock anniversary plastic - my favorite -
bike was pretty fast and would sometimes give me shakes after riding -
both feet on pegs 3rd gear - bad pavement throw shower of rocks
pretty slippery - Fun bike -


Jay Lean copy.jpg
 

DonCox

Well-known member
Likes
336
Location
Lake Havasu City, AZ
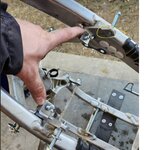
A couple comments, 1mm high for the sprocket is fine, but make sure it is solid and use all 4 bottom bolts and the rear boss mounted to the Swing arm bolt. No rubber mounts. There is no vibration, but these motors put out a ton of torque. Here are some pics of the controller mount. What controller did you get? On the frame trim back the tabs on the top, leaving the YELLOW circled brackets, plastics mount to them. You can see what i left on the side of the battery box. The project looks good.

Frame cut on 2014 YZ.jpg

IMG_2577.JPG

IMG_2578.JPG

IMG_2600.JPG

IMG_2603.JPG

IMG_2604.JPG

IMG_2760.JPG
 

DonCox

Well-known member
Likes
336
Location
Lake Havasu City, AZ
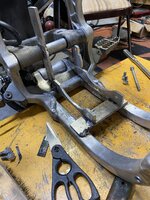
Here is the finished rear mount. Not the prettiest welds, but it has worked flawlessly for over a year on the moto track. The supports going up are to support the bottom of the battery tray. You don't want the battery touching the motor, HEAT. Here is mine at a race last weekend. The Moto starts at about 1:20 in.

IMG_2587.JPG
 

SubSonic

Well-known member
Likes
45
Location
AZ
Hi Don -
Thanks for the info -
What front sprocket are you using (model Bike) ? and how many teeth ?
my yz has 520 chain 48 tooth rear -

Motor mount I designed Im pretty sure everyone will like -
No welding - Simple - Easy make - low weight - looks good - Adjustable -

Once design is Seen - it will be Obvious and Simple for everyone to use -

Im finishing cleaning up design / fit -
even using hardware store parts fit is tight and strong -

designed so motor torque pulls straight on frame and in proper direction -
may add doublers to frame at mount points - likely good idea to do this

also can use swing arm bolt in mount - Real easy

cost about $35 /45 for the parts ended up using -
on 4th trip to hardware store to get/ change parts to get good fit -

Im pretty sure this mount will work good on any twin tube cradle frame -
slight changes / adjustment -

similar mount may work for mounting controller -
I have not looked into that yet -

surprising how many ways these parts can be moved /changed to hook to motor -

will post pictures of mount likely this weekend once I finish clean up on design


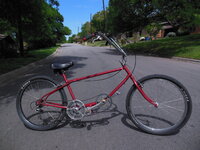
This is a bike I designed / built for my Dad in 1992 - he rode it at airport to get around
dual sprockets was for fun
Very fast and comfortable


DSCN0871 copy.jpg
 

SubSonic

Well-known member
Likes
45
Location
AZ
Thanks Don
I was worried about finding sprocket

Next need to figure out plugs and wiring -
get big switch or circuit breaker or both -
not sure what I need to get -

going to make storage area in front of motor-
water - gear - stuff -

also going to make saddle bags -
maybe make to Clip On using same parts as motor mount

had something like this before on bicycle
bag has 2 wood sticks at top - was sturdy - stable - worked well -

talked to a amazon E Van driver today -
will write about this in Stark Passing thread

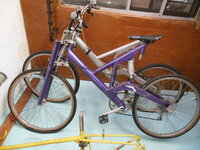
this is full suspension bikes i designed / build 1990 -
made air / oil dampened shocks -
aluminum frame - 32 pounds -
will never forget first time rode full suspension bike - was amazing

DSCN2922 copy.jpg
 

SubSonic

Well-known member
Likes
45
Location
AZ
motor mount is complete
started mounting controller may have it close to finished tomorrow
i will post close up photos and parts listIMG_1139.JPG
 

bayodome

Well-known member
Likes
110
Location
Brooklyn, NY
motor mount is complete
started mounting controller may have it close to finished tomorrow
i will post close up photos and parts listView attachment 10778

Don is going to cringe as those mounts. No possible way those are strong enough. I know the motor is small but do not be deceived by the size... it puts out a hell of a lot of torque and will folding those top mounts forward in a second.

Also just a friendly note, your front brake cable is meant to be routed between the fork and the wheel, not on the outside of the fork as you have it now. Since you'll be using this for desert riding, you don't want it to get snagged on a branch or shrub while cruising the trails.
 

DonCox

Well-known member
Likes
336
Location
Lake Havasu City, AZ
motor mount is complete
started mounting controller may have it close to finished tomorrow
i will post close up photos and parts listView attachment 10778
Subsonic, I have to agree with Bayodome, no way are those mounts going to last. Beside not lasting, the motor is too high, the chain will wear out the rubber chain guides on the swingarm, while being very noisy. These motors are tearing out well designed mounts. The torque is huge. You are here in Arizona some where, right? Bring the bike to me and I will mount the motor for you. For free. So you can enjoy this electric motorcycle for a lot longer and safer. There is a time to be a Mc Gyver, but this has to be done right the first time.
 

SubSonic

Well-known member
Likes
45
Location
AZ
Hi Guys - Thanks for your thoughts and offer -

Im sure this will be strong enough

this is not a new mount idea -
has been used on go karts forever -
Mount Clamps frame tubes with brackets to motor -

With everything tightened up motor is held in place very solid -
6 out of 8 motor mount tabs are attached -

With motor in operation
2 top rods are put in tension - not compression -
Lower front 2 eye bolts are put in tension also
Lower rear 2 eye bolts are in compression but are very short - 35mm

All of the mounting bolts / rods are pre tensioned - tightened up
Very solid

2 mount tabs that are close to swing arm pivot I did not use yet but can if needed -
Might use if regen load on the motor mounts is higher than expected -
Im pretty sure bracket at rear of motor is strong enough to handle this load


Sprocket is higher than stock - but I can adjust if needed -
YZ/WR supermoto conversions seem to have problem with swing arm guides Wearing out fast -
Ive never had this problem but I gear tall on front sprocket -
My guess is problem is caused by using small front sprocket -

One thing Im going to do is spread load where frame is clamped to -Bigger
yesterday got some aluminum angle to make gussets plates with -
Aluminum tube can be easy to dent /tear if load not spread enough -

Lower frame tubes are pretty thin and any welding / grinding need to be done carefully -
I used to repair / weld $pendy bicycle frames - 80% of cracks in frames were caused by bad welds -
Over Heated
Aluminum frames would snap at bad weld area with loud crunch sound -
Steel would usually crack / squeek before complete fail

Its amazing how thin the metal on these can be and still be very strong
when done properly especially on aluminum

Even tho I am a school trained tig welder I am a Big fan of Adhesives -
properly designed adhesive joints can be Crazy strong and easy to do -

1990 designed a aluminum full suspension bike that was glued together -
Test frame was loaded to 660 lbs of torque - test bench started bending -

Glueing aluminum has to be done correctly but its Doable by many DIY builders -

1980s I helped build a airplane from epoxy fiberglass and foam -
Test pieces were pushed to fail - amazingly strong and light -
Was eye opening to strength of adhesives -

I think Brackets adhesive bonded to frame is a good way to go for DIY -

Friend has water jet cutter and I have been talking to him about
Designing / Making motor mounts that are Universal fit for these bikes -
He thinks market not big enough -
I tell him good to be early than late -
 

bayodome

Well-known member
Likes
110
Location
Brooklyn, NY
Hi Guys - Thanks for your thoughts and offer -

Im sure this will be strong enough

this is not a new mount idea -
has been used on go karts forever -
Mount Clamps frame tubes with brackets to motor -

With everything tightened up motor is held in place very solid -
6 out of 8 motor mount tabs are attached -

With motor in operation
2 top rods are put in tension - not compression -
Lower front 2 eye bolts are put in tension also
Lower rear 2 eye bolts are in compression but are very short - 35mm

All of the mounting bolts / rods are pre tensioned - tightened up
Very solid

2 mount tabs that are close to swing arm pivot I did not use yet but can if needed -
Might use if regen load on the motor mounts is higher than expected -
Im pretty sure bracket at rear of motor is strong enough to handle this load


Sprocket is higher than stock - but I can adjust if needed -
YZ/WR supermoto conversions seem to have problem with swing arm guides Wearing out fast -
Ive never had this problem but I gear tall on front sprocket -
My guess is problem is caused by using small front sprocket -

One thing Im going to do is spread load where frame is clamped to -Bigger
yesterday got some aluminum angle to make gussets plates with -
Aluminum tube can be easy to dent /tear if load not spread enough -

Lower frame tubes are pretty thin and any welding / grinding need to be done carefully -
I used to repair / weld $pendy bicycle frames - 80% of cracks in frames were caused by bad welds -
Over Heated
Aluminum frames would snap at bad weld area with loud crunch sound -
Steel would usually crack / squeek before complete fail

Its amazing how thin the metal on these can be and still be very strong
when done properly especially on aluminum

Even tho I am a school trained tig welder I am a Big fan of Adhesives -
properly designed adhesive joints can be Crazy strong and easy to do -

1990 designed a aluminum full suspension bike that was glued together -
Test frame was loaded to 660 lbs of torque - test bench started bending -

Glueing aluminum has to be done correctly but its Doable by many DIY builders -

1980s I helped build a airplane from epoxy fiberglass and foam -
Test pieces were pushed to fail - amazingly strong and light -
Was eye opening to strength of adhesives -

I think Brackets adhesive bonded to frame is a good way to go for DIY -

Friend has water jet cutter and I have been talking to him about
Designing / Making motor mounts that are Universal fit for these bikes -
He thinks market not big enough -
I tell him good to be early than late -
Appreciate the DIY approach and it sounds like you have the knowledge to do it BUT, Don (who helped me and MANY others immensely with our conversions) just offered you FREE hands-on help. I'd jump on that in a heartbeat if I was local like you are.

Also, Lithium-king.com just started making exactly what you described although his are laser cut: UNIVERSAL MOUNTS for the QS138 70H V3 for $99. Or he'll custom make you some for $150. Either way, that's an insane deal. I paid $400 for mine from MightE as that's all that was available at the time.

There's a large and growing community of QS138 70H conversions and converters out there. You can find a ton on the Electric Motorcycle Builds Facebook group. Like I said, I have a lot of respect for the DIY approach, but ignoring the learnings of others is foolish. You don't have to follow all of it, but much of the advice I gathered was very practical.

And don't forget, this is a dirt bike. Not a go-cart driving on a flat surface, not a bicycle that's human powered and weighs 20-30 pounds. MX bikes experience far more stresses than virtually any other type of vehicle and builds must account for this.
 

SubSonic

Well-known member
Likes
45
Location
AZ
I posted this to show what I am building -
have not asked for any help - just showing what Im doing -

have been making mechanical things my whole life -


I can actually weld - completed 3 tig welding schools - Lot of Time / work - $$
owned 8 different welding machines -

have Owned and training on -
2 Clausing Metal lathes
1 Bridgeport mill -
1 CNC Dyna mill -

set up / operated several laser cutters -

many 3d printers

Having spent the Time and money to learn how to use these tools properly
it bothers me to see some people Show or Claim this is How to do it -
like welding -

spewing metal with a mig then grinding it off is not welding -
its dangerous and embarrassing -
especially when pictures of this bad welding get posted to another persons thread -
did not even ask -

aluminum is hard to weld if you dont know what UR doing -
paying a Real welder is worth the money knowing UR frame wont snap -

Ridden dirt bikes whole life - this is #16
5th Yamaha 450f

Im pretty sure this motor mount is going to work good -
motor is solidly held in place right now -
can easily make stronger if needed -
one of reasons I made this way -

can see a design that is Universal being Stamped out of steel -
1 or 2 plate parts with Bolts clamp frame - -

clamped or bonded or Both -
my guess is clamping frame will be more than good enough -
no welding needed -

frame with Twin tube cradle should work for
universal mount setup

as a example of how strong clamping metal tubes can be -

lets look 3 feet forward on bike and there is the fork tubes
held in place the the Triple clamps -

that is the Whole front end of bike with weight /Turning and Breaking forces
held in place by 4 clamps to steel tubes -
 
Similar threads
Thread starter Title Forum Replies Date
SubSonic New Donor bike 2011 YZ450F Pictures 4
Flynryan Alta MXR vs YZ450 Videos 2
F Foss - Varg Build Stark Varg -- Discussion 4

Similar threads

Top Bottom