- Likes
- 2,802
- Location
- Pennsylvania
So as most of us know our side number plates are prone to breaking, especially the right side. The outer plate breaks off the inner mounting lip/flange and unfortunately the inventory of right side panels that Liquid Performance had has now been exhausted.
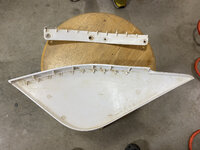
The fix I will describe consists of a 3D printed part that will serve as a new mounting point that you can fasten your broken off panel to.
Model is available for free download HERE
This part can be printed in two pieces and not affect the functionality (which is what I did on the pictured prototype). I uploaded both the one and two piece designs. The one piece design you will need to add supports, two piece all I did was add brim on my first attempt and it printed successfully. I printed a half scale model as a one piece but did not attempt the full scale one piece print. This example is of the right side only but both sides are available for download.
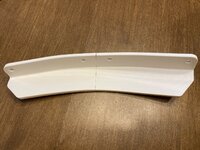
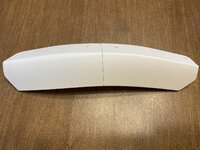
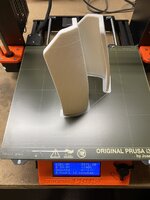
On the two piece models, I added holes that you can dowel the two halves together using pieces of 1.75mm filament cut to 12mm long.
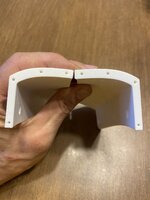

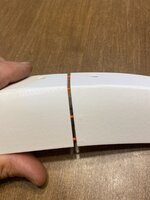
Now there can be multiple ways you could reattach the panel to the printed support (bolts, adhesives, etc.), but for the sake of my demonstration I bolted it on using button head screws. These “elevator screws” that I found on McMaster Carr might also make a good choice-
Screws, 18-8 Stainless Steel, 1/4"-20 Thread, 3/4" Long

 www.mcmaster.com
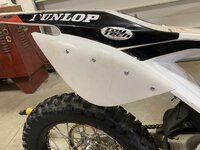
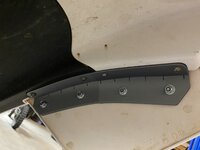
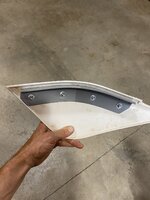
The end result feels very rigid, perhaps too rigid but it’s a start. This will be a work in progress so please share your feedback here and I'll do my best to implement any changes to the design. Also, anyone who would like to try their hand at any "remixes", please do!
The Problem

The fix I will describe consists of a 3D printed part that will serve as a new mounting point that you can fasten your broken off panel to.
Model is available for free download HERE
This part can be printed in two pieces and not affect the functionality (which is what I did on the pictured prototype). I uploaded both the one and two piece designs. The one piece design you will need to add supports, two piece all I did was add brim on my first attempt and it printed successfully. I printed a half scale model as a one piece but did not attempt the full scale one piece print. This example is of the right side only but both sides are available for download.
The Fix


On the two piece models, I added holes that you can dowel the two halves together using pieces of 1.75mm filament cut to 12mm long.


Now there can be multiple ways you could reattach the panel to the printed support (bolts, adhesives, etc.), but for the sake of my demonstration I bolted it on using button head screws. These “elevator screws” that I found on McMaster Carr might also make a good choice-
Screws, 18-8 Stainless Steel, 1/4"-20 Thread, 3/4" Long
McMaster-Carr
McMaster-Carr is the complete source for your plant with over 595,000 products. 98% of products ordered ship from stock and deliver same or next day.


The end result feels very rigid, perhaps too rigid but it’s a start. This will be a work in progress so please share your feedback here and I'll do my best to implement any changes to the design. Also, anyone who would like to try their hand at any "remixes", please do!
