Error while charging


snydes

Moderator
Staff member
Likes
2,798
Location
Pennsylvania
Well checked out this video.
seems all doable.

Just to check i have everything needed for remounting the pack.
I need this?
https://www.amazon.com/gp/product/B002CXGSKY/?tag=sce0f-20
McMaster-Carr
And some thermal guide past for in between the modules.

Anything else?

Disclaimer
The following is for information only. Shea (guy in the video) is experienced in EV tech and makes this pack breakdown look very "casual". Disassembly is very dangerous and should only be done by somebody who is experienced with electricity and electrical safety. We are dealing with deadly voltages. I don't mean to sound condescending but I don't know your level of knowledge and this isn't something your average dirt bike guy should be doing.

Having said that the best I can do is educate people based on my experience. As far as equipment there should be a non conductive work surface, insulated mat to stand on and 600v gloves to open up the battery. A heat gun will be necessary to remove the bottom cover and to remove the pack emblems without completely destroying them. Once the affected module is removed the problem cell must be located. The P groups are labeled and with every broken bond that I have seen I had to test individual cell voltages (need good multi-meter) to find the disconnected cell as they are not obvious. If there would happen to be a blown fuse this would be an altogether different problem that would not be repairable by this method, we are only talking about dealing with bad wirebonds from manufacturing. Before any attempt to reconnect a cell to it's P group that cells voltage must be brought up or down to match the rest of the group. To do that one could use a charger such as the Sky Imax B6 or similar. Jumpers such as "mini grabbers" may be helpful to attach to delicate fuse wires for charging/discharging. The actual repair requires the hand of a surgeon as there is so little room to work with. The Alta fuse wire appears to be a .020" aluminum wire. I'm told there is an aluminum flux that may work. I can not confirm that. Once the cell is reconnected to the group the whole group should then be charged/discharged to match the rest of the P groups. A heat sink compound such as Dow Corning 340 should be used as needed to reinstall the module. The battery could then be reassembled and tested.

Again, this is for information only and I do not advise this be attempted unless the individual is experienced. Disclaimer over.
 

Brillie35

Make Alta Great Again
Likes
136
Location
Netherlands
Ok thanks for the information.
I have an engineering company and do a lot of machine building and electric installations myself.
I made small battery packs before.
But not with a voltage like this.
I am well aware of the dangers that come with dismounting the battery pack.
But i appreciate you point them out.
As this is indeed very dangerous if you don't know what you are doing.

I am going to do a test on a single cell first.
To test if spotwelding a aluminium wire makes a good connection.
Before i open up the pack.
 

snydes

Moderator
Staff member
Likes
2,798
Location
Pennsylvania
Excellent, I just don't want people to get the impression that this is a shade tree mechanic job and take it lightly.

I'd love for you to share your findings, I don't believe the spot welding will work with the aluminum wire but I'd be more than happy to be wrong on that. The other issue with spot welding is the space restrictions. You will see what I mean when you have a look at these negative connections. My next experiment is with this aluminum flux as soon as I have some extra time.
 

Brillie35

Make Alta Great Again
Likes
136
Location
Netherlands
It is possible with a tab:
But maybe that the wire on the side is to critical.
I will test it and post my findings.

Are the original welds made with a ultrasonic weld?
 

Philip

Administrator
Staff member
Likes
4,252
Location
Lake Havasu City, AZ
I would solder a copper wire instead of aluminum. IMO, there is no need to fuse the battery on both the positive side and the negative side. One aluminum fuse is enough, and it will blow, if need be. I have not heard any arguments to the contrary.
 

Brillie35

Make Alta Great Again
Likes
136
Location
Netherlands
The conduction of aluminium in relation to copper is around 60%.
So you could use a Ø0,3mm copper wire instead of a Ø0,5mm aluminium wire.
And keep more or less the same safety.

Going to try them both anyway, and some thicker copper wire.
1 fuse wire seems indeed sufficient to me.
And 0,3 is very thin.

Just looking at the pictures it just seems such a fragile way to connect a battery.
This is from the KTM freeride battery. (not opened by me)
But the connection looks so much better.

22553204_1630422067015166_6167033752908870040_o.jpg
 

snydes

Moderator
Staff member
Likes
2,798
Location
Pennsylvania
The conduction of aluminium in relation to copper is around 60%.
So you could use a Ø0,3mm copper wire instead of a Ø0,5mm aluminium wire.
And keep more or less the same safety.

Going to try them both anyway, and some thicker copper wire.
1 fuse wire seems indeed sufficient to me.
And 0,3 is very thin.

Just looking at the pictures it just seems such a fragile way to connect a battery.
This is from the KTM freeride battery. (not opened by me)
But the connection looks so much better.

View attachment 3240

Interesting... does anyone know if they use the 18650 form factor as well? It looks like they probably are.
 

GummyBear22

Active member
Likes
28
Location
The Netherlands
Just to join in, they used samsung 18650’s 2000mAh in their first gen 2.6kWh battery pack

In their second gen pack (3.9kWh) they use Sony’s, don’t know which one though.
 

Brillie35

Make Alta Great Again
Likes
136
Location
Netherlands
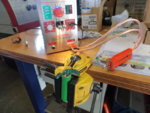
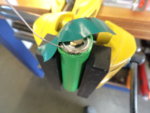
Got my spotwelder today, did some quick tests to check if it at least is possible to weld a wire on the side of the battery cell.
Got the best result with a tinned copper wire.
I have ordered 0,5mm aluminium wire to make some further tests with, it should come in beginning next week.

DSC02759.JPG

DSC02761.JPG
 

Brillie35

Make Alta Great Again
Likes
136
Location
Netherlands
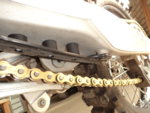
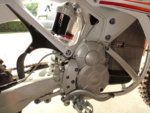
Did some updates to the bike aswell.
After reading that some had troubles bleeding the double rear brake, i tried a bleed screw on top of the insert.
It works very well as the left hand brake is very strong with only one finger aplied.
You can very easily brake slide with it.
Did the extra spring on the bottom of the rear brake so the pedal stays always on top.
So you don't lose that slack while operating it with the handlever.

DSC02715.JPG

DSC02718.JPG

rem insert.JPG

rem insert_.JPG
 

VINSANITY

Well-known member
Likes
398
Location
Texas
So you were able to take apart your battery and repair it, that’s a major achievement in my opinion.

Do you think it would be possible to replace all the cells down the road when there are improved batteries?
 

Brillie35

Make Alta Great Again
Likes
136
Location
Netherlands
So you were able to take apart your battery and repair it, that’s a major achievement in my opinion.

Do you think it would be possible to replace all the cells down the road when there are improved batteries?

No, i did use a seperate batterycell to do tests on.
As i have a possible broken wirebond in my battery pack, i wanted to do some test first before opening everything up.

It would probably be possible to replace and reconnect all cells of the battery pack.
But that would be costly and time consuming.
Before that is going to happen the need has to be high enough.

I have a error code for my battery, but otherwise the bike works just fine.
So if i can not make a wirebond that i am sattisfied with, i am not even going to open my battery pack.

I did find out that the nickelplated tabs provided with the spotwelder are a lot easier to connect to the battery.
So maybe i am going to make a little tab with a fuse wire soldered on it, and spotweld it on the battery.
Or maybe just a small tab from the battery to the print.
 

Redwolf

My dog thinks I'm cool
Likes
1,678
Location
Brinnon, Wa.

Similar threads

Top Bottom