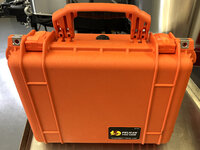
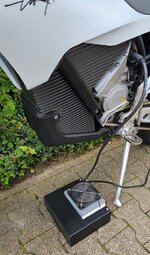
Moving Varg charger to different case


Chadx

Well-known member
Likes
131
Location
Montana
Inspired by others that have removed the Varg charger from the stand and moved it into a different case, thought I'd start a dedicated thread for this.
There are already some great images and info in the thread Poll: Are you using the original Stark Varg Stand/Charger as intended?
but thought someone searching might have an easier time finding a dedicated thread. And, I've not seen any pictures of taking it apart. Only the finished product, which gave me a false start becaue I first started taking off the bolts on the front of the charger rather than rear. Someone posted a link to a tiktok video, but I don't have a tiktok log in so couldn't watch it. In any case, home someone finds these pictures interesting.

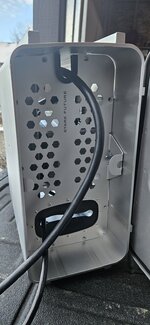
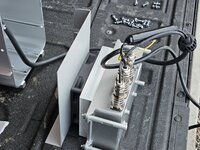
I started by removing the four larger bolts that hold the charge housing into the stand. But, like mentioned, I then started to remove the T30 bolts from the front of the charger housing only to find out it was unnecessary (and the two side ones are hard to get to because the bracket lips block access to the bolt head). Also noted those bolts didn't have any washers on them like the bolts on the back).

I put them back in and started removing the bolts from the rear of the charger housing. These had been installed through a black foam gasket and so punched out a sticky little bit of foam that stuck to the end of the bolt.

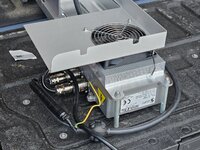
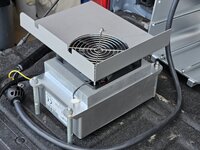
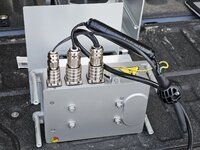
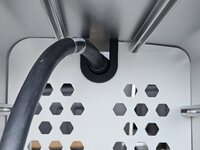
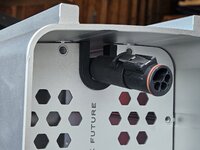
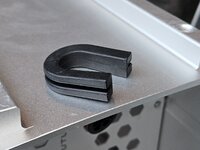
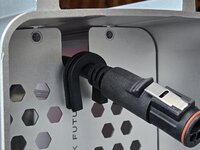
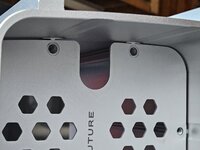
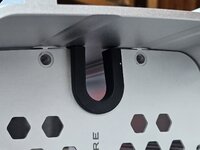
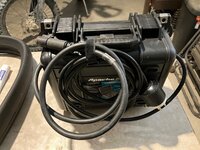
Then I removed the four bolts holding in the legs of the charger itself. The 240v cord easily pulled through it's opening as I pulled out the charger from the housing, but the bike charger connector could not fit through it's opening until the U shaped trim gasket was removed (see next post's images).

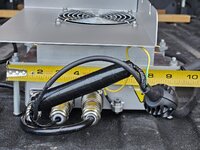
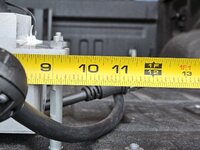
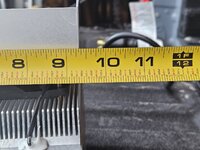
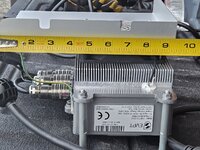
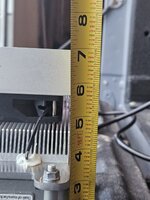
In images that others have moved these into a case, they don't have the silver/aluminum protector that is mounted to the fan in my below pics. Likely because that makes the charger too tall for the popular 6" tall cases that are used like the Harbor Freight 3800 and 4800 cases. With that shroud, my charger is over 7" tall.

Dimension of the charger itself, rounded to the nearest 1/2": 9.5"L x 9.5"W x 7"T.

I'm looking around for cases that are 8" or taller so I can keep on this shroud and stack the cords on top of that. Think I may have found one.
The Seahorse SW540. Interior: 13.5 x 9.9 x 8.4”
Seahorse SE540 Waterproof Protective Case (13.5 x 9.9 x 8.4”)

But at $76, it's about double the price of the Harbor Freight 3800 case, so maybe I'll just pull that shroud off to get it to fit in the HB 3800 or 4800 which have the following interior dimension:
HB Apache 3800: 14 7/8"L x 10 5/8"W x 6 1/8" T - $40 (regular price, but they do on sale a lot
HB Apache 4800: 17 7/8"L x 12 5/8"W x 6 1/8" T - $60
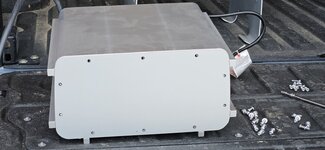
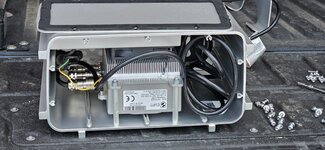
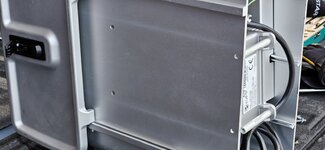
20241117_154724.jpg20241117_154734.jpg20241117_154808.jpg20241117_154826.jpg20241117_155028.jpg20241117_155034.jpg20241117_155044.jpg20241117_155052.jpg
 

Chadx

Well-known member
Likes
131
Location
Montana
These are both super nice solutions. Curious if anyone has done this in any other cases? Have seen the examples of simply adding handles to the OEM aluminum case after removing it from the stand, but looking for something with a bit more protection. I like the idea of having these fulling encased and protected, though I've seen some that have cut holes in the carrying case so the charger can potentially be run with the case closed.
Also saw the non-U.S. user that is selling a kit to install these into an empty KTM charger case.
For my use, I'll keep it protected in a fully sealed case and simply open the lid to access the cords and allow for adequate cooling while charging, but it's fun to see all these other solution.
 

Philip

Administrator
Staff member
Likes
4,226
Location
Lake Havasu City, AZ
Have seen the examples of simply adding handles to the OEM aluminum case after removing it from the stand,
Too heavy and retrieving the cables is still a PITA.
though I've seen some that have cut holes in the carrying case so the charger can potentially be run with the case closed.
Not a good idea. You want to run it with the lid open for cooling. You want to store it with the lid closed to keep the electronics dry and safe.

I am super happy how my Harbor Freight 3800 case turned out. It is more compact and easier to use than the Alta's Rapid Charger, which was the old benchmark for a dirt bike charger, and which had zero complaints about it, only praises.
 

Chadx

Well-known member
Likes
131
Location
Montana
@Philip @Fog 25 I assume you are drilling the bottom of the case and bolting down the charger with the OEM bolts? And maybe adding a fender washer with rubber casket or fender washer with a dab of silicon caulk to seal?
 

Fog 25

Well-known member
Likes
618
Location
Castaic ca
@Philip @Fog 25 I assume you are drilling the bottom of the case and bolting down the charger with the OEM bolts? And maybe adding a fender washer with rubber casket or fender washer with a dab of silicon caulk to seal?
Used the bolts with washers cut up a small plastic bucket (sides) for the cable protection. No need for silicon.
 

AL_V

Well-known member
Likes
152
Location
Canton, Ohio
@Philip @Fog 25 I assume you are drilling the bottom of the case and bolting down the charger with the OEM bolts? And maybe adding a fender washer with rubber casket or fender washer with a dab of silicon caulk to seal?
I'm pretty sure I read somewhere that the charger is waterproof, at least to some IP?? level
 

Chadx

Well-known member
Likes
131
Location
Montana
My concern for sealing all case penetration is more for dust/grit/sand than water. It's unlikely that I'll charge in the rain or setting the case in standing water, I'll regularly be charging by setting the case on gravel or sand in parking lots or dispersed camping spot. Perhaps on wet grass or mud, but for those rare occasions, I could find a different place to set the charger. Guess I could do what I do with my portable air pump and have a square of canvas or square of office carpet to throw on the ground and set the case on that to keep the bottom of the case from getting scratched up from gravel and rocks and keep it a bit cleaner.

I still haven't picked a case. Bouncing back and forth between a few different ones. Thinking through the difference in real world use between ones that are wider and longer inside but short vs not as wide/long, but taller. Will probably remove the large plate on top of the fan either way, but thinking through options and layout for protecting the connectors with a plate or plastic and how I'd prefer to store the cords inside the case.
Yes, I tend of overthink things particularly when I have time and the project doesn't need to be completed immediately. In this case, I have all winter. And, sometimes my designs surpass my fabrication ability and/or tool access and I settle for what I can do with my decidedly non-machine shop tools. Meaning, my envisioned masterpiece of routered, laser cut or CNC machined aluminum protective plates will end up being a scrap of sheet metal, plastic or aluminum cut with a tin snips, hack saw, jig saw or dremel. Ha. Hey, at least I'll hit the grossly-cut radiuses and sharp corners with a file, sand paper or dremel sanding stone.
 

AL_V

Well-known member
Likes
152
Location
Canton, Ohio
My concern for sealing all case penetration is more for dust/grit/sand than water. It's unlikely that I'll charge in the rain or setting the case in standing water, I'll regularly be charging by setting the case on gravel or sand in parking lots or dispersed camping spot. Perhaps on wet grass or mud, but for those rare occasions, I could find a different place to set the charger. Guess I could do what I do with my portable air pump and have a square of canvas or square of office carpet to throw on the ground and set the case on that to keep the bottom of the case from getting scratched up from gravel and rocks and keep it a bit cleaner.

I still haven't picked a case. Bouncing back and forth between a few different ones. Thinking through the difference in real world use between ones that are wider and longer inside but short vs not as wide/long, but taller. Will probably remove the large plate on top of the fan either way, but thinking through options and layout for protecting the connectors with a plate or plastic and how I'd prefer to store the cords inside the case.
Yes, I tend of overthink things particularly when I have time and the project doesn't need to be completed immediately. In this case, I have all winter. And, sometimes my designs surpass my fabrication ability and/or tool access and I settle for what I can do with my decidedly non-machine shop tools. Meaning, my envisioned masterpiece of routered, laser cut or CNC machined aluminum protective plates will end up being a scrap of sheet metal, plastic or aluminum cut with a tin snips, hack saw, jig saw or dremel. Ha. Hey, at least I'll hit the grossly-cut radiuses and sharp corners with a file, sand paper or dremel sanding stone.
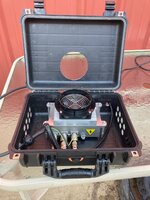
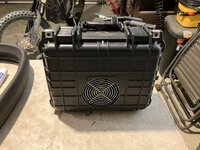
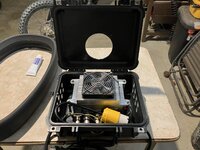
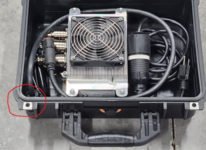
I originally had mine in a Harbor Freight 3800 case because I could store all the cables inside, however, I found that after charging I rarely took the time to return the cables to inside the case. So I switched to a smaller 2800 case, and just keep the cables wrapped up (but the 120v adapter still fits inside the case).
EDIT: BTW, I almost always charge with the case closed, and it keeps cool. Fan doesn't even stay on if I charge around .8Kwh over night.
I have no concerns about dust/grit/sand, nor water.

IMG_7982.jpg

IMG_8196.jpg

IMG_8197.jpg

IMG_8199.jpg
 

Philip

Administrator
Staff member
Likes
4,226
Location
Lake Havasu City, AZ
@Philip @Fog 25 I assume you are drilling the bottom of the case and bolting down the charger with the OEM bolts? And maybe adding a fender washer with rubber casket or fender washer with a dab of silicon caulk to seal?
I drilled a couple of holes in my case for a zip tie to secure the charging cable in place. The cause is not IP67 now, maybe like IP65 or something. The four bolts at the bottom are the original Stark charger bolts, no fender washers, but I Loctited them so as not to lose them because the plastic case is too soft, so they cannot be torqued properly.

I could have used some countersunk and recessed shoulder washers, but that would have been too fancy. The stock charger bolts are working just fine.

1732299642725.png
 

Chadx

Well-known member
Likes
131
Location
Montana
Progress.
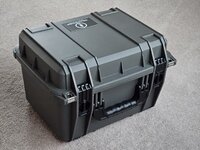
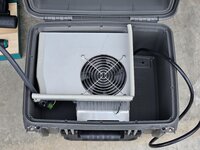
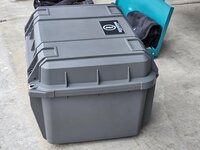
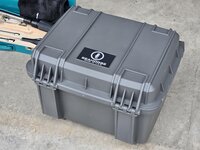
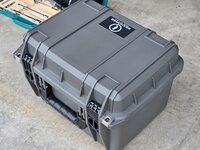
I went with the Seahorse SW540 case. Even though pricier than some other options, there were a couple factors/considerations:
It's taller so gives me some options when it comes to removing the aluminum plate/shroud or not.
It's of a dimension and color that I could use it for another project if I decided to go with a different case.

I ordered in in gray, rather than black, so I can quickly differentiate it from a couple other black hard cases I have. Would be a bugger to accidently grab the wrong case when loading up and getting distracted. Ha.

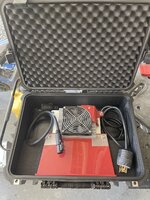
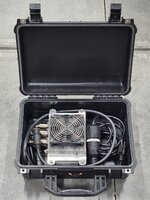
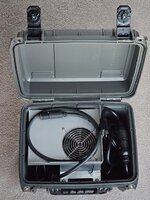
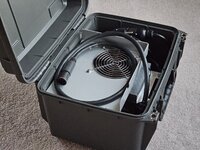
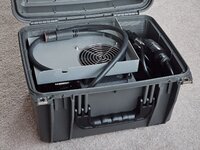
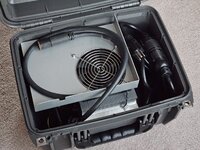
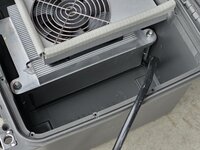
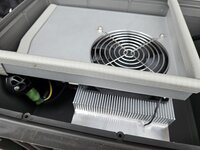
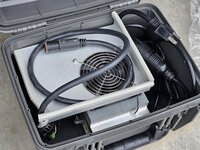
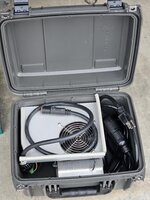
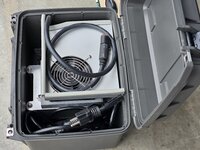
No drilling, cutting, mounting yet. Just test fit it and really like the look. It fits in there snuggly enough that I probably don't absolutely need to bolt it to the case, particularly if I put foam in the lid to help hold the charger and cords in place, but I'll still probably bolt it. Also, will likely keep the aluminum top plate in place. It makes a good place for the charger output cord to lay while the input cord is tucked along side. I may cut out a slot for the output cord to come up with the ball below or just zip tie it around the front. Will not get to the install for a week or two, since it will be 3 or 4 months before I charge the bike next, but wanted to share initial fit test.

Guess I better change my Varg to gray plastic rather than red to match my new case. Ha. (I'd originally specced a gray Varg on my "day 1" preorder, but got a deal on a red with all other specs I wanted. Turns out I like the red. Like the white with gray seat, too. But love the gray. Will probably run red for a year, or maybe see if I can find a subtle decal kit (most are too flashy for me) and then swap out for gray for the 2026 riding season.

20241202_163858.jpg


20241202_163951.jpg

20241202_163932.jpg

20241202_163912.jpg

20241202_164005.jpg
 
Similar threads

Similar threads

Top Bottom