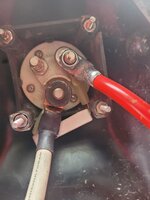
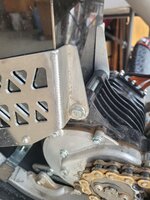
2020 Honda CRF 450 Build

Dave Daum

Well-known member
Likes
93
Location
San Diego
Hello Gang,
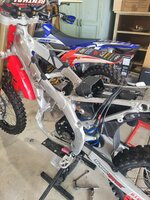
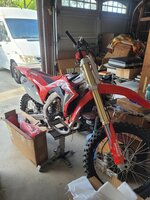
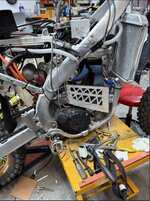
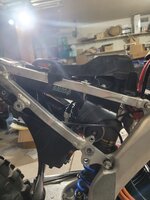
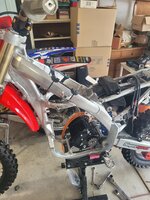
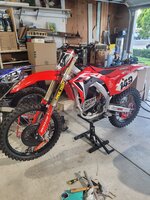
Recently I purchased a pristine 2020 CRF450 rolling chassis with a ton of goodies and about $4000.00 of Racetech suspension work. This bike will become my MX track bike.

Battery = Amorge 72v 58ah P45
Motor = QS138 v3
Controller = EBMX X-9000 VESC

Right now I have about a week into to this project. Tomorrow I'll be TIG welding all the mounts. If all goes well, this bike will be powered up in the next couple of days.

I can't wait to get on the track with @DonCox and ride this bike. Here are some photos for your entertainment. -- Best to all, Dave
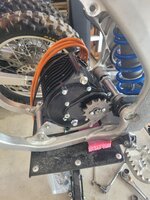
20250601_102855.jpg

20250601_102859.jpg

20250601_102912.jpg

20250601_114044.jpg

20250601_174851.jpg

20250601_174807.jpg
 

Dave Daum
Well-known member
Likes
93
Location
San Diego
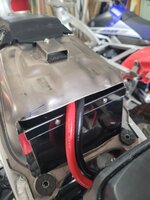
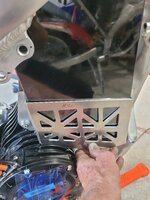
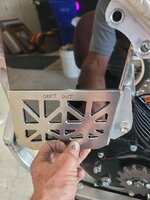
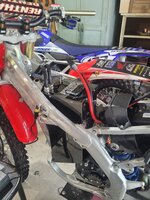
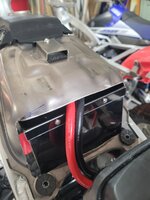
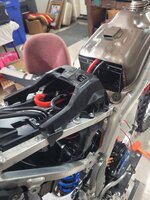
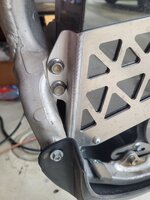
The most difficult task was cutting the titanium fuel tank to clear the battery. The battery can be hot swapped in about 2 minutes. Notice the height of the battery and how the back end of the tank has a big cutout. The entire bottom was removed from the tank. Hopefully these photos show the tank modifications.

20250601_113528.jpg

20250601_114044.jpg
 
Last edited:

fmxxx666

Well-known member
Likes
130
Location
Hamburg Germany
Hi @Dave Daum,
congrats awesome build and a lucky roller find.
so nice to see that after the first build the next ones go like in a blink of an eye :)

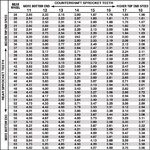
saw you installed the 15T Sprocket.
How much Teeth you use for the rear?
What gearing you run on the other Bike?
Just out of coriosity as I haven´t yet played around with gearing.
I run a 12T Sprocket currently in the front and a 51T in the back (the 51 was on there stock already)
When I bought my mount and the QS sprockets at lithium king I also ordered a 14T but havent tried that yet.
I am actually quiet happy at the moment with the performance on the track but still wanna try out a different front sprocket with more teeth one day just to find out how much of a difference it makes:
Sprocket-Ration-Chart.jpg
 

Dave Daum

Well-known member
Likes
93
Location
San Diego
Greetings @fmxxx666

I’ve been riding my first CRE with a 13/48 sprocket set. That has worked great. I may start with a 13/52 combination then test other gearing combinations. I’ll keep everyone posted on what I like for different motocross tracks. — Dave
 

Dave Daum

Well-known member
Likes
93
Location
San Diego
I bought a second 2020 CRF450R roller. I know, one is enough. It is amazing how many blown up bikes are out there. The electric conversion gives a new, and better, life back to these great bikes. This second bike is super clean. It is almost completely stock. The 2020 I'm presently building has been so easy to convert. I just couldn't pass up a great deal and bought this one...

I'm curious about the 2020 CRF built by @rmz290 and how it is riding?

-- Dave

20250601_175038.jpg
 
Last edited:

Dave Daum

Well-known member
Likes
93
Location
San Diego
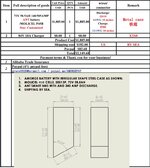
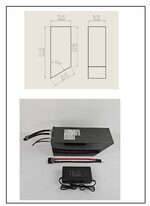
Here are the dimensions and specifications for my battery. So far Amorge has built five of these for my use. I believe @DonCox built one to these dimensions with different battery cells and BMS specifications. @fmxxx666 built a very similar battery with more space up top for added voltage. Thus far the dimensions for this battery has fit (with chassis modifications) the following bikes:
2004 thru 2008 CRF250
2004 thru 2008 CRF450
2010 thru 2013 CRF250
2010 thru 2013 CRF450
2017 thru 2020 CRF250
2017 thru 2020 CRF450
2021 thru 2024 CRF250
2021 thru 2024 CRF450

AMORGE BATTERY FINAL DIMENSIONS.jpg
 

DonCox

Well-known member
Likes
548
Location
Lake Havasu City, AZ
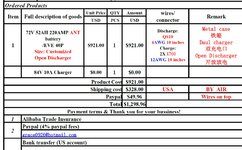
I did install this same size battery from Amorge with the EVE40P cells ( less expensive, only 4000mah but 35-40AH)
A couple of differences in this battery is Open Discharge, to reduce the heat inside the battery Box, Dual Charger ( 2 ports for 2 chargers, faster charging at 120VAC) and the cells for the price difference. You see that on page 2 of my order is a picture with the cables coming out of the front of the battery, ( the front is the long side of the battery). Well ours came with them in the rear. we were able to make this work, since we cut off the top motor mount and ours sits a little lower, but note that on yours to get the correct spot for your output cables

Gary's Amorge Battery.jpg

Gary Battery Order pg 2.jpg

IMG9173b.jpg
 

fmxxx666

Well-known member
Likes
130
Location
Hamburg Germany
awesome
was this your first or second bike with the ebmx controller?
if you need some settings to try out let me know then I can sent you the screenshots of what settings I use at the track.
(I also have the password to unlock the full settings🤫 if needed 😉)
 

Dave Daum

Well-known member
Likes
93
Location
San Diego
awesome
was this your first or second bike with the ebmx controller?
if you need some settings to try out let me know then I can sent you the screenshots of what settings I use at the track.
(I also have the password to unlock the full settings🤫 if needed 😉)
Hello @fmxxx666 . Thank you for your kind offer. This is my first EBMX controller installation. I would absolutely love your help with the settings. Screen shoots and passwords for unlocking the full settings would be a big help.
 

fmxxx666

Well-known member
Likes
130
Location
Hamburg Germany
Ok sure

Here you go:

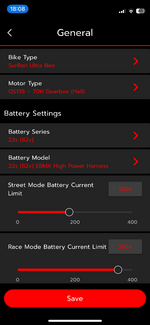
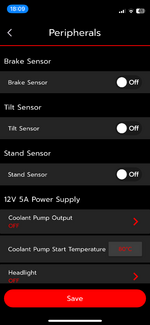
Bike type chose surron ultra bee
Your QS138 motor
After that it will do a motor calibration keep the rear wheel off the ground during that as it will spin slowly.
For battery choose your voltage and set it to EBMX high power harness.
If you choose unlimited you will be prompted for the password.
IMG_3341.png
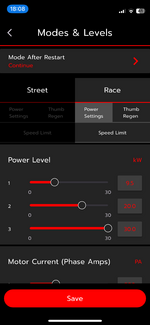
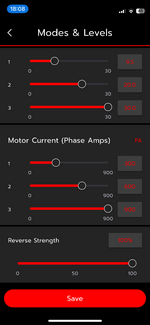
Beneath that you can save the Amp limit of your street and race mode.
I only use the three race modes.
The max you can set is 400A but 350A is already plenty 😅 the controller can also do up to 500A but to get higher than 400A you need the special password that I will sent you in a private message ;)


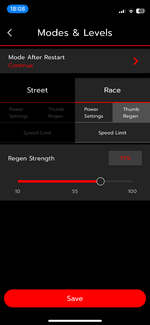
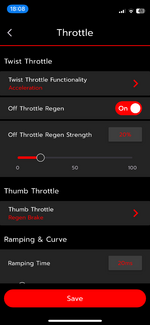
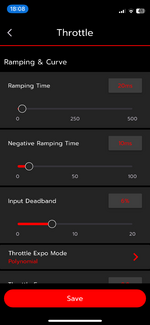
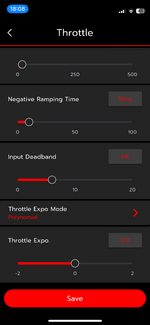
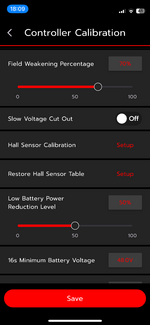
The rest of the pics that I am posting now show all the rest of the settings. Most of the values is best practice and have worked well for me.

My 3 race mode settings are mode 1 to cruise around in the pit, mode 2 is what I use on the track, mode 3 to show off other ppl what the build is capable of (that’s still far from max but already ridiculous).


IMG_3342.png

IMG_3343.pngIMG_3344.pngIMG_3346.pngIMG_3347.pngIMG_3348.pngIMG_3349.pngIMG_3350.pngIMG_3351.png
 
Last edited:

fmxxx666

Well-known member
Likes
130
Location
Hamburg Germany
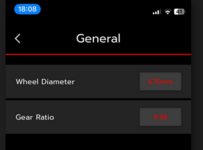
oh forgot to explain this one:

2025_06_05_08_02_55_2020_Honda_CRF_450_Build_Electric_Dirt_Riders_ALTA_Redshift_and_STARK_Varg_F.png
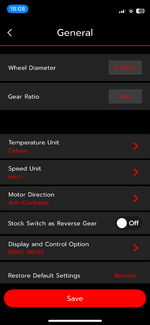
Both values need to be correct otherwise your speedometer won´t tell the truth

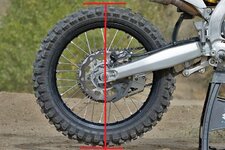
wheel Diameter in Millimeter is from ground to top of your tyre so the complete wheel not just the rims:
Dirt-bike-tire-sizes-D-01-24-2018.jpg


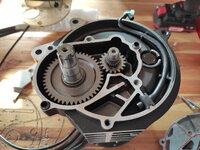
the Gear Ratio value is:
Inside QS138 Reduction Gears (gear #1 is 19t divided by gear #2 is 45t): 2,368
IMG_20210307_091354.jpg

Your sprockets as you wrote earlier front 13t sprocket divided by your rear 52t sprocket = 4
then you multiply both numbers (2.368 * 4) and you end up with your gear ratio 9.47 thats the value you set in the controller
 

Dave Daum

Well-known member
Likes
93
Location
San Diego
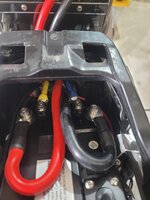
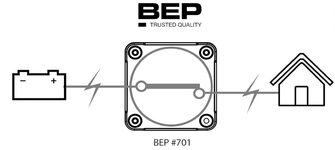
Yesterday I finished the last of everything except wiring the master battery disconnect and resistor. I just need to create a break in the positive electricity flow using a BEP disconnect switch.

1. I'll take positive 4 AWG cable coming from the battery and cut and solder new lugs on to both ends of the cut cable.

2. Then I'll connect of the lugs to the separate terminals on the on/off switch.

3. Next I'll run the positive wire connecting the on/off the switch to the controller B+ terminal.

4. Finally I'll do the fist power up.

The bike is very close to being finished. Wish me luck. Thank you @fmxxx666 and @DonCox for all your guidance.

20250603_083633.jpg

BEP BATTERY DISCONNECT.jpg
 
Last edited:
Top Bottom