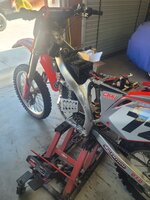
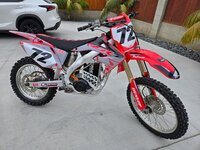
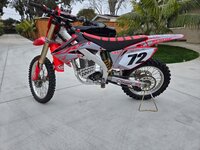
Yet another CRF 250 Build but its my first so... ;)


fmxxx666

Well-known member
Likes
103
Location
Hamburg Germany
@Dave Daum the surron throttle has a super short twist travel way that feels super unnaturral coming from a real gas bike cable throttle

surron:

E-Cable Box:
I have to correct myself here now after some brief forth and back testing regarding the Throttles!

I will now completely switch to the electric hall sensor throttle:
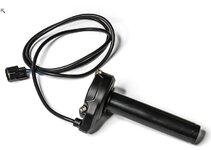
2025_03_18_13_03_27_GashahnLightBee_1800x1800.png_PNG_Grafik_1800_1800_Pixel_Skaliert_56_.jpg


Little sidenote this super thin plastic part where the grip attatches to from the surron throttle can be swapped with a CNC Alloy one:
LINK
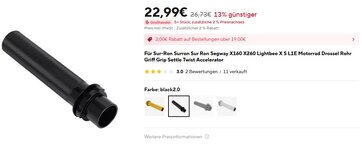
2025_03_18_13_07_15_Für_Sur_Ron_Surron_Sur_Ron_Segway_X160_X260_Lightbee_X_S_L1E_Motorrad_Dros...jpg


As much as I loved the idea and the feel of the Cable throttle its just not practical for riding
as the twist way is much longer than on the Electric throttles (wich are usually all 1/4 turn only).
It fells like on the Gas Bike but here comes the problem... the gas bike had gears and you are not constatnly near the end limit of the throttle twist way, which brakes your natural grip of your right hand. It is constaltly in a bend up position where safe and controlled riding gets harder and harder.
I loved the E Cable Throttle Idea so much I even DIY`ed a Dual Cable Throttle to E Box where you actively open and close the throttle when twisting to even eliminate the rist of sicky throttle you sometimes have on a signge cable throttle:


but yea needed now to give up all those cable attempts now in favour of the hall sensor throttle...
few hundret bucks spent... lessons learned xD
 

fmxxx666

Well-known member
Likes
103
Location
Hamburg Germany
little update on Battery Cage
A buddy of mine has the possibilieites to Weld alluminium so I bought some 5mm thick alloy sheets and alloy pipes.
So we can DIY our way to a battery cage (this will be only a template so it might kinda look wild but we will do a good one after that made from fewer single parts in the correct shape this is now more the try and error method to get to the correct shape :ROFLMAO: )
I wanted to go somewhere near the route @Dave Daum did with his awesome CNC cage but I have only Manual Tools available xD
Unbenannt.jpgUnbenannt1.jpg


Since my Frame is from a 250 not a 450 I don´t have as many mounting points in the fornt of the frame as Dave had...
And I needed to grind away the only mounting points that where there in favour of getting in a bigger battery so we welded in an aluminium pipe with M8 thred to mount the front of the Battery Cage with a Screw from within the Cage:

Unbenannt3.jpgUnbenannt2.jpg

Unbenannt7.jpg

the rear end of the Cage is held by the Screw point on top of the QS138 Motor:
Unbenannt4.jpg
Temporary with a M8 thread rod, Custom Length Stainless Steel Scew is on the way.


here is the sideview of the cage (we had to stop then due to other appointments... but I marked in the pic the next steps:
-Blue is outlines of the Battery inside the Cage
-Red is where the Aluminium Pipes underneath the cage should go where the battery sits on
-Yellow parts we will cut away to get rid of material and sharp edges
Unbenannt5.png

Once this is all finished we will take the measurements and make a the cage with fewer parts like the side panels without the welded on brackets for the screw etc..
and the big blank surface will be swiss cheesed with holes to have less material on the bike and better cooling for the battery.
 

bananu7

Member
Likes
14
Location
Gdynia, Poland
but yea needed now to give up all those cable attempts now in favour of the hall sensor throttle...
few hundret bucks spent... lessons learned xD
I got my bike running today and I'm very happy with the cable throttle feel. I just need to replace the cable because the one i have is slightly damaged.

One thing you haven't mentioned trying is a different pulley. Since it's an easily replaceable element, it would be very easy to 3D-print a smaller diameter pulley, giving a shorter pull. It's also possible to "map" the throttle response by making it non-circular.
 

Dave Daum

Well-known member
Likes
68
Location
San Diego
little update on Battery Cage
A buddy of mine has the possibilieites to Weld alluminium so I bought some 5mm thick alloy sheets and alloy pipes.
So we can DIY our way to a battery cage (this will be only a template so it might kinda look wild but we will do a good one after that made from fewer single parts in the correct shape this is now more the try and error method to get to the correct shape :ROFLMAO: )
I wanted to go somewhere near the route @Dave Daum did with his awesome CNC cage but I have only Manual Tools available xD
View attachment 13381View attachment 13382


Since my Frame is from a 250 not a 450 I don´t have as many mounting points in the fornt of the frame as Dave had...
And I needed to grind away the only mounting points that where there in favour of getting in a bigger battery so we welded in an aluminium pipe with M8 thred to mount the front of the Battery Cage with a Screw from within the Cage:

View attachment 13383View attachment 13384

View attachment 13385

the rear end of the Cage is held by the Screw point on top of the QS138 Motor:
View attachment 13386
Temporary with a M8 thread rod, Custom Length Stainless Steel Scew is on the way.


here is the sideview of the cage (we had to stop then due to other appointments... but I marked in the pic the next steps:
-Blue is outlines of the Battery inside the Cage
-Red is where the Aluminium Pipes underneath the cage should go where the battery sits on
-Yellow parts we will cut away to get rid of material and sharp edges
View attachment 13387

Once this is all finished we will take the measurements and make a the cage with fewer parts like the side panels without the welded on brackets for the screw etc..
and the big blank surface will be swiss cheesed with holes to have less material on the bike and better cooling for the battery.
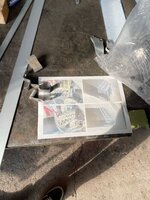
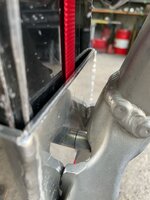
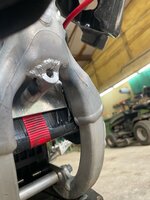
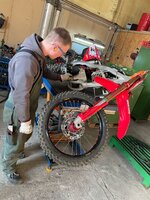
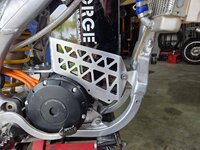
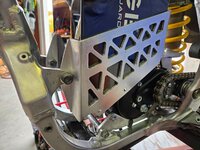
I'm helping my friend Mark as he mounts his new Amorge battery. This is the 2005 CRF we purchased from @DonCox. Here are pics showing the battery mounting process.

20250321_093523.jpg

20250321_093528.jpg

20250321_093517.jpg

20250321_091832.jpg
 

fmxxx666

Well-known member
Likes
103
Location
Hamburg Germany
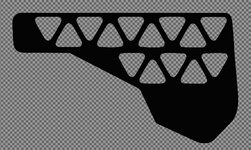
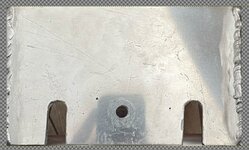
Battery Cage update

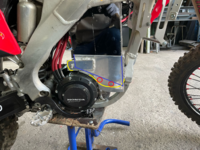
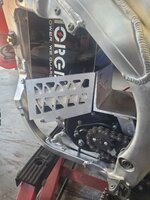
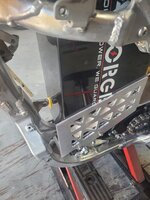
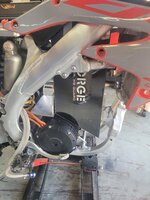
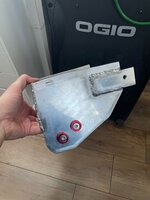
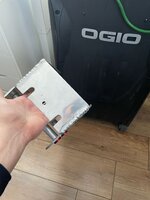
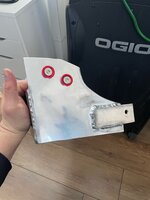
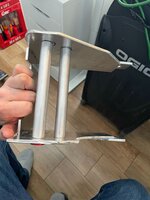
I now that I had a basic idea of the scales for my battery cage with the frankensteine dummy we build:

Unbenannt.jpgUnbenannt1.jpgUnbenannt2.jpgUnbenannt3.jpg

it looks soo terrible xD
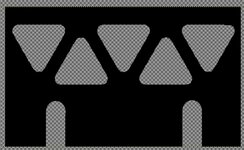
so I went the extra mile now to get a narrowed down shape of the Battery cage in a .DXF format so I can sent it to a CNC Cut Service.
I have zero and I mean that, absolutlely zero skills in CAD software so this kind of tasks usually sends me stranded...
But I am quiet good at Photoshop xD
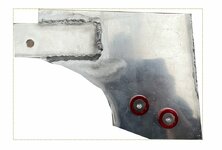
so I started off with a picture of the part and then scale it to size and then draw the new shape lines.
in the end convert picture to vector format > check sizing again and convert to .dxf

so I came from this:

2025_03_26_12_37_57_final.xcf_3.0_RGB_color_8_bit_gamma_integer_GIMP_built_in_sRGB_6_layers_113.jpg

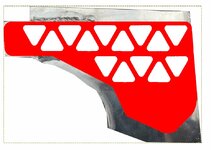
over to this:
2025_03_26_12_38_28_final.xcf_3.0_RGB_color_8_bit_gamma_integer_GIMP_built_in_sRGB_6_layers_113.jpg
and ended with this:

2025_03_26_12_39_48_finalcut_exported_19.0_RGB_color_8_bit_gamma_integer_GIMP_built_in_sRGB_.jpg

I left out the Screw holes as a fault tolerance so I can place the Screw that goes through the top mounting point of the Motor and the holes for the screws that hold the alloy pipes underneath where I need them in the end.

same I did for the front of the cage:

2025_03_26_12_39_08_front_exported_24.0_RGB_color_8_bit_gamma_integer_GIMP_built_in_sRGB_3_l.jpg

2025_03_26_12_39_29_front_exported_24.0_RGB_color_8_bit_gamma_integer_GIMP_built_in_sRGB_3_l.jpg

@Dave Daum sorry buddy had to hijack your round edge triangular cutout idea :) as it is a good looking way to save heavy material on the bike.

Parts are in production now and should be here 4th of April


I don´t think they are usefull for anyone else who does not exactly have my model of bike and my shape of battery but anyway the .dxf files are attached.
 

Attachments

  • file.zip
    14.1 KB · Views: 0

Dave Daum

Well-known member
Likes
68
Location
San Diego
Battery Cage update

I now that I had a basic idea of the scales for my battery cage with the frankensteine dummy we build:

View attachment 13408View attachment 13409View attachment 13410View attachment 13411

it looks soo terrible xD

so I went the extra mile now to get a narrowed down shape of the Battery cage in a .DXF format so I can sent it to a CNC Cut Service.
I have zero and I mean that, absolutlely zero skills in CAD software so this kind of tasks usually sends me stranded...
But I am quiet good at Photoshop xD
so I started off with a picture of the part and then scale it to size and then draw the new shape lines.
in the end convert picture to vector format > check sizing again and convert to .dxf

so I came from this:

View attachment 13412

over to this:
View attachment 13413
and ended with this:

View attachment 13414

I left out the Screw holes as a fault tolerance so I can place the Screw that goes through the top mounting point of the Motor and the holes for the screws that hold the alloy pipes underneath where I need them in the end.

same I did for the front of the cage:

View attachment 13415

View attachment 13416

@Dave Daum sorry buddy had to hijack your round edge triangular cutout idea :) as it is a good looking way to save heavy material on the bike.

Parts are in production now and should be here 4th of April


I don´t think they are usefull for anyone else who does not exactly have my model of bike and my shape of battery but anyway the .dxf files are attached.
Feel free to send me Photoshop or Illustrator files/images and or drawings. I'll be happy to create CAD files in a dxf format for CNC cutting. There will be no cost. We can email back and forth: dave.daum@gmail.com
 

fmxxx666

Well-known member
Likes
103
Location
Hamburg Germany
was out saturday evening at the track (hard packed ground with here and there some soft deep sand spots and turns)


Unbenannt1.jpg


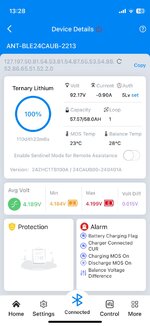
This was the battery status before riding:
(Screenshot from when I was still home and it was connected to the charger so ignore the temps the Battery was at 18 degrees C when I started to Ride)
Unbenannt.jpg


I was doing 2 slow rounds to get to know the track
then 15 min riding at the max I was physically capable of xD
(Remember I didn´t rode for 10 years just getting back into it)
Temp outside was 16 degrees C
Motor after the 15 min was at 34 degrees C
Battery after the 15 min was at 20 degrees C
Controller after the 15 min was 22 degrees C
so all seems to be very well sized and capable of handling the power.
Power level I rode in on the track was 350Amps, 600Phase Amps, 20KW, at 9X,xV, Fluxweakening at 70%
after that I paused for a bit, had to chat with several ppl that noticed I had an Electric bike and came up to me with questions.
Its not a thing here yet even starks you only see very rarely so you naturally attract some attention.
Then there was a flat area where I tested out some power level settings and throttle settings as I don´t have that much space availble at home.
for about 10 min mostly in Power level 350Amps, 900Phase Amps, 30KW, Fluxweakening at 70% but thats like really rediculus power.
I still have my controller on the Safe settings I can unlock it to 500Amps 1000Phase 40KW as my battery would do that with ease but thats beyond rideable.

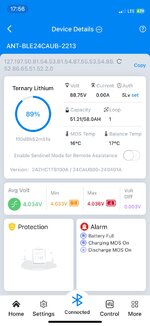
before I loaded the bike back up I took a snapshot of the Battery status:
Unbenannt2.jpg

and I only used like 11% :ROFLMAO:
I know the amp draw is not lineal and the lower you get the faster its going to drain the battery but that makes me confident that within this season I don´t have to think about recharging at the track as my Body´s battery would be empty before my bike battery.
 

Dave Daum

Well-known member
Likes
68
Location
San Diego
was out saturday evening at the track (hard packed ground with here and there some soft deep sand spots and turns)


View attachment 13445


This was the battery status before riding:
(Screenshot from when I was still home and it was connected to the charger so ignore the temps the Battery was at 18 degrees C when I started to Ride)
View attachment 13446


I was doing 2 slow rounds to get to know the track
then 15 min riding at the max I was physically capable of xD
(Remember I didn´t rode for 10 years just getting back into it)
Temp outside was 16 degrees C
Motor after the 15 min was at 34 degrees C
Battery after the 15 min was at 20 degrees C
Controller after the 15 min was 22 degrees C
so all seems to be very well sized and capable of handling the power.
Power level I rode in on the track was 350Amps, 600Phase Amps, 20KW, at 9X,xV, Fluxweakening at 70%
after that I paused for a bit, had to chat with several ppl that noticed I had an Electric bike and came up to me with questions.
Its not a thing here yet even starks you only see very rarely so you naturally attract some attention.
Then there was a flat area where I tested out some power level settings and throttle settings as I don´t have that much space availble at home.
for about 10 min mostly in Power level 350Amps, 900Phase Amps, 30KW, Fluxweakening at 70% but thats like really rediculus power.
I still have my controller on the Safe settings I can unlock it to 500Amps 1000Phase 40KW as my battery would do that with ease but thats beyond rideable.

before I loaded the bike back up I took a snapshot of the Battery status:
View attachment 13447

and I only used like 11% :ROFLMAO:
I know the amp draw is not lineal and the lower you get the faster its going to drain the battery but that makes me confident that within this season I don´t have to think about recharging at the track as my Body´s battery would be empty before my bike battery.
@fmxx666, Great update. Your bike is a thing of beauty! It sounds like you love your new bike.

It too am absolutely loving my new bike. Yesterday I rode a very hard 35 miles of tight single track. The 84v 58ah battery still had more than 20% charge remaining. As mentioned, I'm loving the bike.

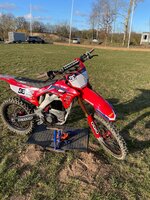
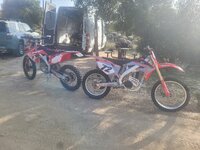
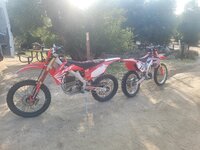
Here are some pics of. The bike we bought from @DonCox and my bike.

20250329_082533.jpg

20250329_082541.jpg
 

fmxxx666

Well-known member
Likes
103
Location
Hamburg Germany
@Dave Daum absolutely in love with my bike as well.
Excited for the future ride days with it.

Would like to also single track it around my area but it’s strictly forbidden if you have a MX bike… you can get away with it if you have a registered enduro with lights and licenseplate and all that stuff and if you are not going through „nature Reservats“ (which is like 80% of all of our woods).

So I have to stick with the MX Tracks.
I am too old to risk police chases 😅

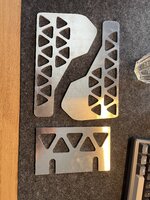
My Laser cut battery cage parts arrived today 😁 now waiting for my welder buddy to have time
IMG_2786.jpeg
 

Dave Daum

Well-known member
Likes
68
Location
San Diego
@Dave Daum absolutely in love with my bike as well.
Excited for the future ride days with it.

Would like to also single track it around my area but it’s strictly forbidden if you have a MX bike… you can get away with it if you have a registered enduro with lights and licenseplate and all that stuff and if you are not going through „nature Reservats“ (which is like 80% of all of our woods).

So I have to stick with the MX Tracks.
I am too old to risk police chases 😅

My Laser cut battery cage parts arrived today 😁 now waiting for my welder buddy to have time
View attachment 13456
We too are restricted from riding in many trail areas. That is exactly the reason why I converted my bike to make it street-legal. Now I can ride either MX or trail. Typically, the posted signs read " No Off-Road Vehicles" (see below). By licensing my motocross bike, it makes it legal to ride it on the trails. Maybe there is a loop-hole in your legal system that will allow you to do the same.

Every time I go riding I have people gather around to look at my bike. I've let several people try it and they all come back in shocked disbelief. They cannot believe how smooth, easy to ride, how powerful, and how well it handles!

Your bike is looking so sexy. I love your laser cut brackets!!! They will look killer on the bike. I generally cut my brackets slightly over-sized then trim them to fit before welding. That allows me to get away with minor variations in the final fitting. I cant wait to see the progress.

My next project bike will be a full blown MX bike using QS138 V3 and EBMX X-9000 control. I'm anxious to compare the differences between my Votol EM-260 and the X-9000. I'm sure you will need to help me with dialing in the X-9000 program.

Wir wissen Ihre Freundschaft sehr zu schätzen. Mit freundlichen Grüßen, -- Dave

1743445579102.png
 

fmxxx666

Well-known member
Likes
103
Location
Hamburg Germany
New Connector Kid on the Block or am I just late to the party?

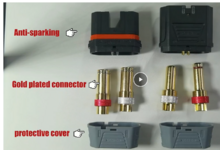
just found out about the QS-12 Connector.
Quiet a few upgrades over the QS-10

QS12 Connector Black Antispark Connector super heavy duty current connector

Specification:
Item name: QS12-S Super heavy duty antispark connector
Plastic material: PA
Flammability rating: UL94VO
Rated Voltage: DC 500V
Max Current: 320A
Instantaneous current: 250A
Hardware material : Gold Plated Brass
Contact resistance: 0.20mΩ
Working temperature : -30 ℃ to -150 ℃
Max Wire: 4AWG
Recommended using times: 1000 times

so all in all more durable and can resist more current than the QS10
But the most interresting for me is the possibility to unscrew the Tabs :eek:
who ever tried to solder a QS10 Connector might know how much of a hassle it is and how much of a benefit it would be to have more space available while soldering together such large pieces


2025_04_01_10_46_40_Amazon.com_BABUVYA_250A_High_Current_QS12_Anti_Spark_Connector_with_4Pin_S...png
 
Top Bottom