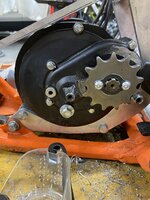
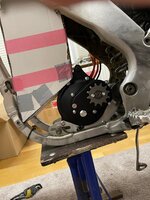
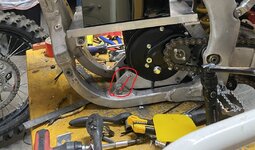
Yet another CRF 250 Build but its my first so... ;)


unluckypanda

New member
Likes
0
Location
California
About to buy a 20s13p battery from Amorge myself with a similar shape. Going with their Lishens instead of the Samsung 50S. P42A/P45B is way too out of budget for me.

I thought about going 50S because at 13p I'd get 65AH with a peak of about 335a. I would use 300a continuous at most. Then I thought it might not last even though theres 13 extra AH, due to heat from using the cells near their peak often while riding. Would cost me around ~$1450 for the 50S cells, ~$1900 for P42A, but ~$1000 for Lishens.

Going to pay tomorrow morning
 

fmxxx666

Active member
Likes
32
Location
Hamburg Germany
@unluckypanda
I was at the same point as you now.
I took the time to watch this Video and try to learn everything about the cells along the way (thats a freaking 4H+ Video xD)
but the guy put a lot of effort into this:

but after watching this I sattled on the Molicel P45B as it gives me the most bang for the bug for my build as of right now.
 

fmxxx666

Active member
Likes
32
Location
Hamburg Germany
Today is the day I just placed my Order at Amorge :)


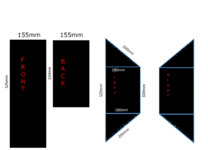
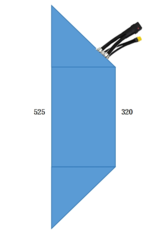
so my final Battery Shape for the Honda CRF 250 2009 (same frame from 2006-2009) is:

Molicel P45B
22S13P 81.4V 58.5AH (Optional 20S14P 72V 63AH but I went with 22S)
Metal Casing
Open Discharge (BMS only for Charging)
QS10 Plug for Discharge
XT90 Plug for Charging
QS10 Plug Battery Leads 650mm Length
10A Charger
Shipping by air
batterysize_final1.png


plugs_position.png


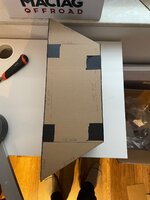
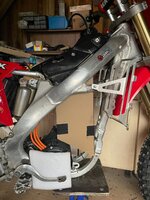
Unbenannt.jpgUnbenannt1.jpgUnbenannt2.jpgUnbenannt3.jpg

Molicel P45B
22S13P 81.4V 58.5AH

so this Battery pack will give me:

Total Number of Cells in the Pack: 286.00
Battery Configuration: 22S13P
Pack Capacity: 58.50 Ah
Pack Energy: 4633.20 Wh
Pack Max. Voltage: 92.40 V
Pack Nominal Voltage: 79.20 V
Pack Cutoff Voltage: 55.00 V
Max. Discharge Current: 585.00 A

I plan to set the controller for 300A continuous and 450A Peak so I am still on the very safe side I guess.


Thanks to all of you who contributed knowledge and wisdom (y)
 

fmxxx666

Active member
Likes
32
Location
Hamburg Germany
Little update on the Project Build Costs now that I am almost done:
E-MX Bike Build
Parts (include Shipping Costs plus Tax and Toll to Germany)Money outMoney in
Honda CRF 250 R 2009
1.800,00 €​
Sold the CRF 250 Engine
700 €​
QS138 70H v3 E-Motor
533,44 €​
EBMX X-9000 V2 Controller
1.458,90 €​
TX-Race Plastics Kit (restyle to CRF450 2021+ plastics)
472,00 €​
Lithoum King Motor Mounts and 2x Sprockets 13T & 15T
214,00 €​
EBMX X-900 QS138 Harness
211,86 €​
Surron Throttle
11,89 €​
E-Cable Box
33,00 €​
Cable Trottle
9,29 €​
Screws Bolt Pipes Nuts etc:
3,55 €​
Screws Bolt Pipes Nuts etc:
13,99 €​
Screws Bolt Pipes Nuts etc:
19,49 €​
Screws Bolt Pipes Nuts etc:
59,67 €​
Screws Bolt Pipes Nuts etc:
45,46 €​
Screws Bolt Pipes Nuts etc:
8,39 €​
Screws Bolt Pipes Nuts etc:
8,49 €​
Screws Bolt Pipes Nuts etc:
9,49 €​
Polisport Plastik Kit White ( TX-Race only offeres Red, but the bike should be black and white only in the end)
99,00 €​
Magura Master Cylinder (left hand rear break) Used
90,00 €​
Brake line front to rear 160cm
20,00 €​
a ton of Black Aluminium "Bling Bling" parts for the bike, and other screws, Oils, Brakelines, etc.
400,00 €​
CRF250 Carb sold
100,00 €​
Amorge Battery 22S13P Molicel P45B 81V58AH Open Discharge BMS only for Charging
2.500,00 €​
Backyard Design Decals
190,00 €​
Total Build Cost:
Costs:Earnings:
7.411,91 €​
8.211,91 €​
800 €​
Without Bike Parts only:
6.311,91 €​
Without Style, just the needed E-Parts:
5.100,55 €​


Throttle wise I am going with the E-Cable Box for now:
has the best feel in my opinion

I just cannot get warm with the Surron and other E-Throttles as they give me only nearly half the Twist-way of the Original Throttle:


Already installed now a Left Hand Rear Brake:
-Master Cylinder Magura 167
-Brake Line 170CM

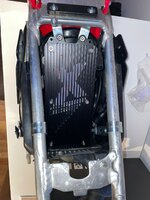
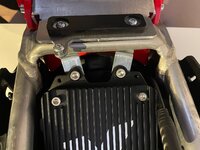
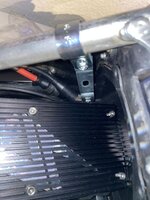
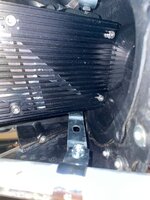
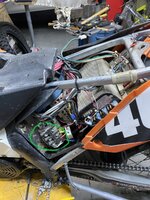
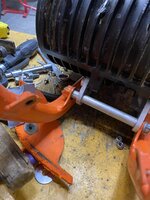
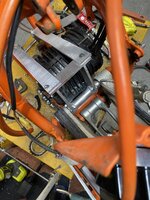
Made Fitment Brackets for the Controller inside the Airbox:
Unbenannt4.jpgUnbenannt5.jpgUnbenannt6.jpgUnbenannt7.jpg
isn´t moving a single bit now with all the force my body was able to produce.
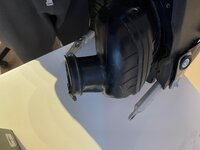
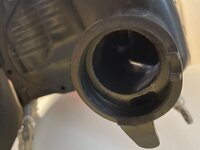
Cables will go in and out through the hole of the Carb side of the Airbox:
Unbenannt9.jpgUnbenannt10.jpg

once all the wiring is tested I will double heatshrink every connection and put liquid insulation tape around anything electronically thas exposed to the elements.
I want it to be fully capable of beeing pressure washed from any angle.


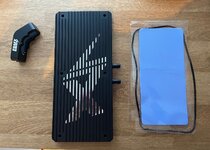
I also bought the Watercooling Heatsink for the controller:
Unbenannt8.jpg

But thats just to have it if needed I will leave the Air Heatsink on it for now and see if it ever gets so hot that it would make sense to add the watercooling since this would add additional wight for Pump, Hoses and Radiators.


Spending time now on the little things until the battery arrives
Getting it clean in every edge,
grease all bearings,
Locktite all the Screws I touched in the Build Process,
finding the perfect route for the wiring (secure and away from moving parts),
remove all those old 24MX Decals.
 

fmxxx666

Active member
Likes
32
Location
Hamburg Germany
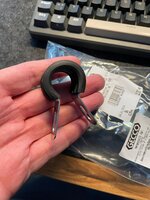
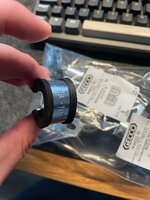
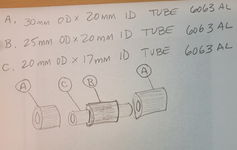
@unluckypanda haha I have no idea what these things are called xD I just ran through the local Hardware Store and looked for something that has nuts or screws attached and mounts on something round so I ended up in the Plumbing corner and found these:
Unbenannt11.jpgUnbenannt12.jpg

as I was not smart enough to measure the diameter fo the frames pipes before so I just grabbed a bunch in different sizes, test fitted at home installed the ones that where fitting the tightest and brought back the other ones :rolleyes: always two of these where connected to a Metal Plate with three holes in it, these I streched out and used them as the attachment plates to mont the Controller.


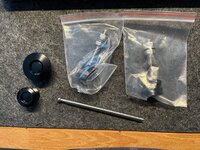
for all interested in the "Push Lock" things I just recieved them and they are awesome

Unbenannt13.jpg

Planning to mount the tank + plastics and seat with that system so I can quickly Change or take out the Battery since I guess I will never store the Battery inside the Bike when not in use so I will have often the case to take out the Battery.

the TX-Race Restyle kit has a super annoying Screw on the back of the Seat this takes me always 5 min to align and get screwed in since you need to hit a nut underneath that is invisible while you are doing it so this push lock makes it a seconds thing:
 
Top Bottom