I will send you photographs of how I attached my battery. I was in the same situation as you. I am happy to cut and ship brackets to you. Look for photos today.Bike looks awesome! Congrats!
On your battery fitment, it's great that it's so snug, but I highly recommend doing a proper mount, both for your safety, the safety of others and for the battery's protection. If you were only riding street then it wouldn't matter, but if you're doing MX, the stresses g-forces that a bike endures while on the track need to be accounted for.
The way it's resting directly on the motor is not ideal, and one hard hit could put undue stress on that part of the motor casing, and even worse, on that very nice metal case of the battery. Don't forget, there are cells right underneath that... you did design it after all.
Also, in the case of a bad crash, if the battery is not properly secured, you very well could have a 50 pound projectile flying towards who knows where. Not ideal.
You are using an out of date browser. It may not display this or other websites correctly.
You should upgrade or use an alternative browser.
You should upgrade or use an alternative browser.
Yet another CRF 250 Build but its my first so... ;)
- Thread starter fmxxx666
- Start date
@bayodome
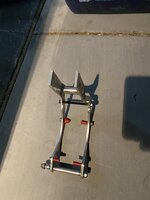
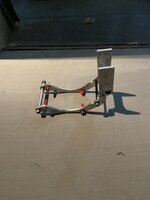
sure thing no worries I will fix that battery in its place.
It will get support from right, left, bottom and one open closable bar from the top.
I will grind off some more from the top of he motor anyway to gain space for the support frame.
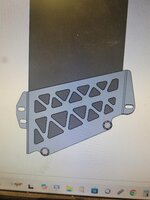
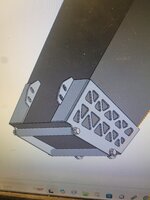
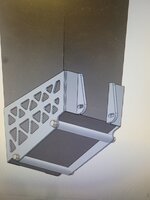
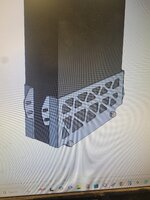
DonCox
Well-known member
- Likes
- 629
- Location
- Lake Havasu City, AZ
Dave that looks great on the battery mount system. One thing I try to do is to not have the battery touch the motor, We found in the hotter summer days here in the Southwest USA, that the battery will overheat before the motor, so if it doesn't touch or connect to the motor, none of the motor heat will transfer into the battery.
And as @bayodome mentioned is securing the battery for the worse case scenario, endo, bike flipping. The battery will try to get out... I sure know motocross has sent me for some for some wild rides.
And as @bayodome mentioned is securing the battery for the worse case scenario, endo, bike flipping. The battery will try to get out... I sure know motocross has sent me for some for some wild rides.
Hello @DonCox, you are completely right about the heat transfer and the need to secure the battery. The battery on my mount has a small gap with EVA foam between the motor and the mount. Like @bayodome did with his YZ, the bottom cradle secures the battery very tightly. Over the top I'm running a 2 inch wide nylon web strap with an over center latch to prevent any vertical movement. It is very simple and effective. I'll try and post some detailed photos over the next couple of days.Dave that looks great on the battery mount system. One thing I try to do is to not have the battery touch the motor, We found in the hotter summer days here in the Southwest USA, that the battery will overheat before the motor, so if it doesn't touch or connect to the motor, none of the motor heat will transfer into the battery.
And as @bayodome mentioned is securing the battery for the worse case scenario, endo, bike flipping. The battery will try to get out... I sure know motocross has sent me for some for some wild rides.
Hello @DonCox, you are completely right about the heat transfer and the need to secure the battery. The battery on my mount has a small gap with EVA foam between the motor and the mount. Like @bayodome did with his YZ, the bottom cradle secures the battery very tightly. Over the top I'm running a 2 inch wide nylon web strap with an over center latch to prevent any vertical movement. It is very simple and effective. I'll try and post some detailed photos over the next couple of days.
fmxxx666
Well-known member
- Likes
- 162
- Location
- Hamburg Germany
bananu7
Member
- Likes
- 16
- Location
- Gdynia, Poland
Hey, a quick Q from me - to OP or Don. How on earth are you able to
1) keep the left-side mount on the outside of QS138 70H
2) fit it into a 200x CRF frame
3) keep a proper chainline?
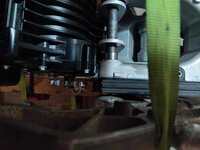
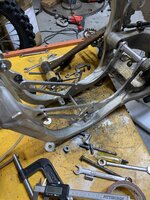
I moved the engine as far left as possible, slid the sprocket on the shaft as far left to the notch as possible, and still had to relocate the mount to the inside of the engine to get this pic.
1) keep the left-side mount on the outside of QS138 70H
2) fit it into a 200x CRF frame
3) keep a proper chainline?

I moved the engine as far left as possible, slid the sprocket on the shaft as far left to the notch as possible, and still had to relocate the mount to the inside of the engine to get this pic.
fmxxx666
Well-known member
- Likes
- 162
- Location
- Hamburg Germany
@bananu7 I don’t really get your question  what do you mean with relocate the mount to the inside of the engine?
It’s been a while since I was at that step but I found some pics:
Here is how it sits on the swingarm bolt:
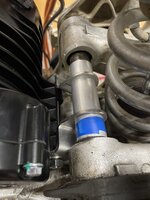
Needed to use flat head screws on the bottom part of the mount so it has enough clearance to go down next to the bottom frame of the bike:
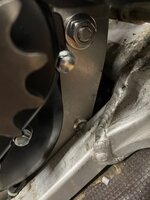
On the right side bottom of the motor I needed to grind away a bit of the cooling rills so it does not touch the frame:
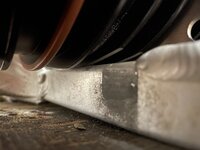
this is how it looks on the front mount:
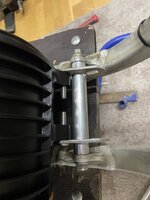
I don’t like the big hole of the universal mount so in a bit I will order the custom lithium king mount made for my specs.
chain alignment is as straight as my eyes can judge I compared with the original gas bike and the center of the front sprocket is just 7mm more to the left (7mm more away) from the swingarm pivot point. Has same hight as original. But technically it’s not possible to get the sprocket nearer to the pivot point.
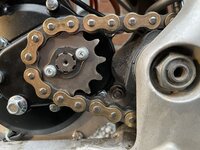
It’s been a while since I was at that step but I found some pics:
Here is how it sits on the swingarm bolt:

Needed to use flat head screws on the bottom part of the mount so it has enough clearance to go down next to the bottom frame of the bike:

On the right side bottom of the motor I needed to grind away a bit of the cooling rills so it does not touch the frame:

this is how it looks on the front mount:

I don’t like the big hole of the universal mount so in a bit I will order the custom lithium king mount made for my specs.
chain alignment is as straight as my eyes can judge I compared with the original gas bike and the center of the front sprocket is just 7mm more to the left (7mm more away) from the swingarm pivot point. Has same hight as original. But technically it’s not possible to get the sprocket nearer to the pivot point.

DonCox
Well-known member
- Likes
- 629
- Location
- Lake Havasu City, AZ
Thanks guys. I was having the same question/issue as @bananu7. I'll post pics when the snow clears and temp rises a bit.
This pic from Don gives me a better idea on what I'm probably going to have to do to get the rear left bracket to meet the swingarm bolt but still get in line with my chain. I think lithium-kings mounts have a built in offset but some others like Don's did not. Also, my frame narrows in the front and the front motor mounts are not anywhere near where the bracket will end up. Thinking spacers up there welded or something. I'll have to get my mounts and see what I can fab up.
But in conclusion it seems like there is often some custom fabrication work done of some kind on the mounts on most bikes.
Hey, a quick Q from me - to OP or Don. How on earth are you able to
1) keep the left-side mount on the outside of QS138 70H
2) fit it into a 200x CRF frame
3) keep a proper chainline?
View attachment 13172
I moved the engine as far left as possible, slid the sprocket on the shaft as far left to the notch as possible, and still had to relocate the mount to the inside of the engine to get this pic.
I can't tell but it looks like your mounts do not have an offset at the swing arm. Is that right? If so, that would explain the mounting on the inside part. I'm sure you are already aware but note the lithium king mounts that I believe @fmxxx666 used (universal I think) have an offset/bend at the back near the swing arm bolt to they can position in different areas with spacers to lock things up EV Parts & Conversion Kits - Motor Mounts.
DonCox
Well-known member
- Likes
- 629
- Location
- Lake Havasu City, AZ
In a 2023 Honda CRF 250 build I did, we had to offset in the other direction. You just have to become creative, but the alignment is critical . My method to align is first get the rear wheel centered in the rear by getting both tension adjusters exactly equal ( use calibers) then snug up the axle bolt. Then clamp a piece of square tubing, or angle iron the is due straight, to the outside of the rear sprocket. Now this should align with the front sprocket, if not there is your alignment work.
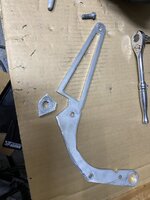
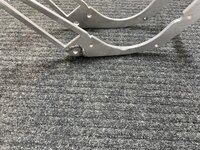


bananu7
Member
- Likes
- 16
- Location
- Gdynia, Poland
Thanks for the replies!
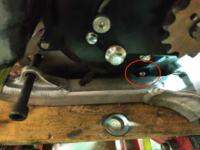
I believe you can still clearly see that the left-side mounting plate (which, again, is completely flat) sits on the inside, in between the two mounts, and is mounted to the motor from inside. Thing is I don't have clearance issues on the swingarm bolt; if you look at my pic a couple posts above, there's still loads of space there especially if you use the short inner bearing bushing. But even if I did that, I couldn't move the engine any more to the outside because of the area marked in red. Maybe I just have a narrower frame? I've heard that the 450s were a bit wider, but I thought ours would be virtually identical. Here's the relevant point from your pic:
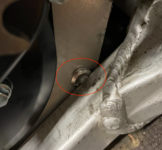
If I moved the mount to the outside like you did, I'd be pushing the motor 6mm further inwards. With a thinner steel mount, that's still at least 3mm, plus, in your case, the screw head thickness (which could be replaced by a conical head here, btw).
More to that point, if you look at my earlier pic, I think was actually able to get the motor further back than you did.:
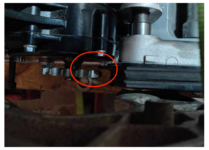
This is, for reference, a smaller-than-stock 428-14T. It's just very weird that we get such differences. All in all, I think my way of putting the plates on the inside (once I make them lay flat on the mounts, which is not a given because they weren't meant to be used like that and all reference faces are on the outside) will be maybe marginally less stiff than putting it outside, but I avoid having to deal with the bends - even if, as I said, I could pull it off in the first place for bottom clearance reasons.
No, they don't. I initially assumed I can make completely flat plates work. And maybe I still can?I can't tell but it looks like your mounts do not have an offset at the swing arm. Is that right? If so, that would explain the mounting on the inside part. I'm sure you are already aware but note the lithium king mounts that I believe @fmxxx666 used (universal I think) have an offset/bend at the back near the swing arm bolt to they can position in different areas with spacers to lock things up EV Parts & Conversion Kits - Motor Mounts.
If you grind a bit of the casing on the inside, you can fit the plate to it from inside. Sorry for the crap pic, but it's the only one I have at hand when writing this:I don’t really get your questionwhat do you mean with relocate the mount to the inside of the engine?

I believe you can still clearly see that the left-side mounting plate (which, again, is completely flat) sits on the inside, in between the two mounts, and is mounted to the motor from inside. Thing is I don't have clearance issues on the swingarm bolt; if you look at my pic a couple posts above, there's still loads of space there especially if you use the short inner bearing bushing. But even if I did that, I couldn't move the engine any more to the outside because of the area marked in red. Maybe I just have a narrower frame? I've heard that the 450s were a bit wider, but I thought ours would be virtually identical. Here's the relevant point from your pic:

If I moved the mount to the outside like you did, I'd be pushing the motor 6mm further inwards. With a thinner steel mount, that's still at least 3mm, plus, in your case, the screw head thickness (which could be replaced by a conical head here, btw).
More to that point, if you look at my earlier pic, I think was actually able to get the motor further back than you did.:

This is, for reference, a smaller-than-stock 428-14T. It's just very weird that we get such differences. All in all, I think my way of putting the plates on the inside (once I make them lay flat on the mounts, which is not a given because they weren't meant to be used like that and all reference faces are on the outside) will be maybe marginally less stiff than putting it outside, but I avoid having to deal with the bends - even if, as I said, I could pull it off in the first place for bottom clearance reasons.
DonCox
Well-known member
- Likes
- 629
- Location
- Lake Havasu City, AZ
This is a 200x CRF frame. No one else here has done one of those, It is probably a smaller frame. On the KX100 frames you have to notch the fin on the motor to sit the motor all the way down onto the center tube. Your up and down position may not be optimal, but you must get the front sprocket aligned with the rear sprocket.Hey, a quick Q from me - to OP or Don. How on earth are you able to
1) keep the left-side mount on the outside of QS138 70H
2) fit it into a 200x CRF frame
3) keep a proper chainline?
View attachment 13172
I moved the engine as far left as possible, slid the sprocket on the shaft as far left to the notch as possible, and still had to relocate the mount to the inside of the engine to get this pic.
fmxxx666
Well-known member
- Likes
- 162
- Location
- Hamburg Germany
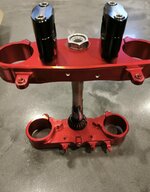
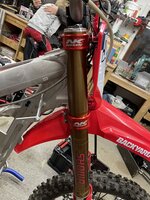
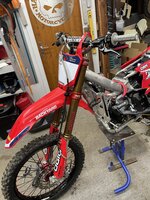
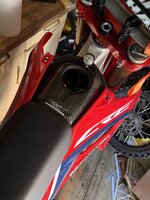
Time moved on but the weather is still freaking cold and all tracks are closed.
So I spent some more time fiddeling around on the Build.
quick testrun around the house some weeks ago before the new suspension and triple clamps where installed
Ignore the ratterling noise of the chain xD the chain tention was way too tight read somewhere on EV´s you need to have it more on the tighter side but I put it back to CRF Manual Chain Slack after that and now it sounds normal.
after a few testruns I noticed I am not a huge fan of the left hand rear brake as I thought I would be...
so now I am getting back to rear foot brake and since I have space now on the left side of the Handlebar I can install an "E-Clutch" Lever
I bought another E-Cable box that just translates a Steel Wire Signal into an electrical signal and wired it up to my EBMX Controller instead of the Thump throttle that you could use for Regen Brake, normal throttle or E-Clutch. I used it as E-Clutch before and liked the feature so now I am going to move that physically from the Thumb throttle to a real clutch lever:
just having to wait for a few more parts (clutch lever & cable) but the electical side is fixed already.
and lastly I have installed now a Magnetic Pull Killswitch that cuts the 5v+ Signal the throttle is getting:
for anyone who wants to recreate this its an "opener" killswitch [NOT A "CLOSER"]
the opener opens the circuit once the magnet is pulled so the throttle hall sensor does not get any voltage.
While I was looking for a killswitch I had to order like 5 different ones as it seems to be a usual thing to have a "closer" killswitch and nerly no webshop has the description for these things right, even if you write them a mail in advance you will could end up with a god damn closer xD
So I spent some more time fiddeling around on the Build.
quick testrun around the house some weeks ago before the new suspension and triple clamps where installed
Ignore the ratterling noise of the chain xD the chain tention was way too tight read somewhere on EV´s you need to have it more on the tighter side but I put it back to CRF Manual Chain Slack after that and now it sounds normal.
after a few testruns I noticed I am not a huge fan of the left hand rear brake as I thought I would be...
so now I am getting back to rear foot brake and since I have space now on the left side of the Handlebar I can install an "E-Clutch" Lever
I bought another E-Cable box that just translates a Steel Wire Signal into an electrical signal and wired it up to my EBMX Controller instead of the Thump throttle that you could use for Regen Brake, normal throttle or E-Clutch. I used it as E-Clutch before and liked the feature so now I am going to move that physically from the Thumb throttle to a real clutch lever:
just having to wait for a few more parts (clutch lever & cable) but the electical side is fixed already.
and lastly I have installed now a Magnetic Pull Killswitch that cuts the 5v+ Signal the throttle is getting:
for anyone who wants to recreate this its an "opener" killswitch [NOT A "CLOSER"]
the opener opens the circuit once the magnet is pulled so the throttle hall sensor does not get any voltage.
While I was looking for a killswitch I had to order like 5 different ones as it seems to be a usual thing to have a "closer" killswitch
@fmxxx666:
I wish I were allowed to ride in a home garden like yours, maybe building a little ramp for a jump or at least being able to do some figure 8s. Wow, coming back from home after work, training with the bike half an hour, if you have a flat the garage is 5 seconds from you... what a dream; I hope you are allowed to do that on a regular basis, with an electric MX bike you don't bother anyone, just make sure you don't end up into your neighbour's kitchen!
I live in Italy and here basically you can't do whatever the F you want with your land, you have to ask the town council for an unlikely permission whcih would take maybe years to be achieved
 but let's change topic because this one makes me furious.
If I were in your shoes I would measure the pulling force to disconnect that kill switch, for example using a fishing scale, and I would compare it to the weight of the dangling part, remembering to use the same units: the ratio should give you the maximum acceleration in Gs that it will withstand and I would aim for something high like at least 10G, so that it cuts the connection only if you end up off the bke and not for things like some violent landings.
I wish I were allowed to ride in a home garden like yours, maybe building a little ramp for a jump or at least being able to do some figure 8s. Wow, coming back from home after work, training with the bike half an hour, if you have a flat the garage is 5 seconds from you... what a dream; I hope you are allowed to do that on a regular basis, with an electric MX bike you don't bother anyone, just make sure you don't end up into your neighbour's kitchen!
I live in Italy and here basically you can't do whatever the F you want with your land, you have to ask the town council for an unlikely permission whcih would take maybe years to be achieved
If I were in your shoes I would measure the pulling force to disconnect that kill switch, for example using a fishing scale, and I would compare it to the weight of the dangling part, remembering to use the same units: the ratio should give you the maximum acceleration in Gs that it will withstand and I would aim for something high like at least 10G, so that it cuts the connection only if you end up off the bke and not for things like some violent landings.
fmxxx666
Well-known member
- Likes
- 162
- Location
- Hamburg Germany
@Theo haha I feel you there Germany is no different from Italy every f ing thing is regulated and you are pretty much not allowed to do anything that’s fun. Wasn’t my garden, was at a friends house as he has a heated workshop where we did my suspension. My own garden would be too small for this as well. But I only live 2km away from a nice MX Track that’s open Monday to Saturday from 14:00-19:00 (at least from April onwards) so let’s say Wednesday after work hook on the pre packed trailer and 4 min later I am at the track doing some rounds and 2 hrs later I am home again tired and happy 
fmxxx666
Well-known member
- Likes
- 162
- Location
- Hamburg Germany
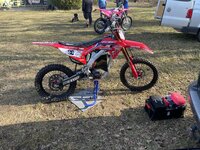
First day at the track today.
I am absolutely exhausted and the battery had 70% left when I was done xD.
All held up well and nothing came loose so I call this a Successful trip.
All other riders that where there wanted a testride
Here a short vid of one of the other dudes testriding my bike (I sadly have no GoPro etc equipment atm to film myself riding)
Similar threads
- Replies
- 18
- Views
- 2,002
- Replies
- 417
- Views
- 66,701

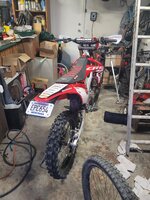
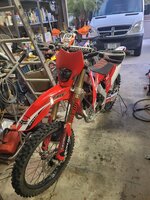
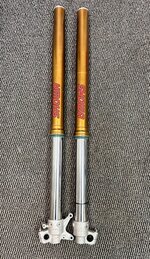
![IMG_7074[1].JPG IMG_7074[1].JPG](https://electricdirtriders.com/data/attachments/13/13182-c002270c1b72a3c3614d986dc3f58b59.jpg?hash=wAInDBtyo8)